Side Dishes
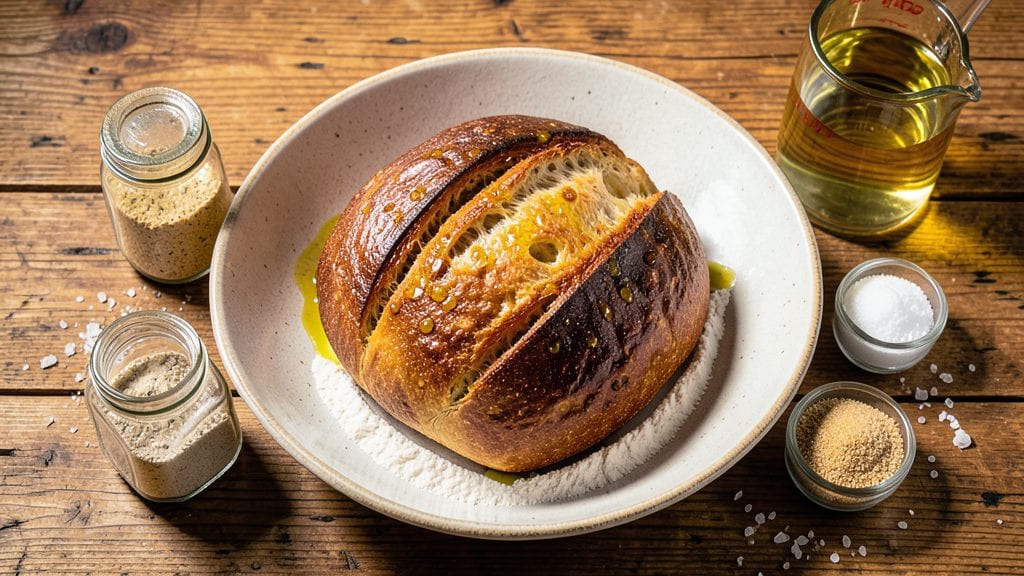
Angelo's bread recipe delivers that magical pull-apart texture and golden crust that makes every Italian meal feel like a celebration.
This traditional Italian bread, with its signature flaky layers and buttery aroma, has been a staple in Italian-American households for generations—perfect for soaking up soups, sandwiches, or simply enjoyed warm from the oven.
What sets this recipe apart is the precise technique of folding and layering the dough, which creates those coveted air pockets and crispy edges.
The process begins with a simple dough of flour, yeast, water, and salt, but the real artistry comes in the careful folding and proofing stages.
Unlike many breads, Angelo's bread relies on steam during baking to achieve its signature flaky, crispy layers—a technique that requires patience but delivers restaurant-quality results. The dough rests twice, allowing flavors to develop fully and creating that signature texture that makes it irresistible.
By the time you pull it from the oven, you'll have a loaf with a golden, crackly crust and tender, airy layers that practically melt in your mouth. The aroma alone will have everyone gathering around the table, and the first bite delivers that perfect balance of crispy and soft.
This bread isn't just for holidays—it elevates any meal, from a simple salad to a hearty pasta dish.
The beauty of this recipe is its versatility. While the classic version uses just flour, yeast, water, and salt, you can easily customize it with olive oil for extra richness or herbs for added flavor.
Whether you're serving it at a family gathering or enjoying a quiet dinner at home, Angelo's bread brings a touch of Italian tradition to your table. Let's get started on creating this timeless classic.
Ingredients for angelo's bread
Four simple ingredients create Angelo's legendary pull-apart magic—flaky layers and golden crust.
| Ingredient | Amount | Notes |
|---|---|---|
| All-Purpose Flour 🌾 | 5 cups | Plus 1 tbsp for dusting |
| Active Dry Yeast 🍞 | 2 ¼ tsp | Or 1 packet (7g) |
| Granulated Sugar 🍬 | 1 tbsp | For yeast activation |
| Warm Water 💧 | 1 ¼ cups | 110°F for yeast |
| Salt 🧂 | 1 ½ tsp | Kosher or sea salt |
| Extra-Virgin Olive Oil 🫒 | ¼ cup | Optional for richness |
| Cornmeal 🌽 | ½ cup | For dusting baking sheet |
| Ice Cubes ❄️ | 1 cup | For chilling dough |
The flour is everything here. King Arthur or Caputo Tipo 00 make all the difference for that signature texture, but store-brand all-purpose works in a pinch. The yeast? Fresh is best—check the expiration date if using packets. Warm water needs to be 110°F (like a warm bath), not hot. Too hot kills the yeast, and you'll end up with flat bread. I always buy yeast in bulk at Whole Foods—lasts months in the freezer. The olive oil is optional but adds that buttery aroma everyone loves. Skip it if you're keeping it classic.
No yeast? Instant yeast works 1:1, but active dry needs to proof first. Short on sugar? Honey or maple syrup at half the amount works too. The cornmeal is just for the pan—semolina or flour works if you're out. Ice cubes? Freeze water in a tray ahead of time so you're not scrambling. Want extra flavor? Swap half the flour for whole wheat or add 1 tsp dried rosemary to the dough. The dough will be sticky—don't fight it. Wet hands help turn it without sticking.
This dough needs 2-3 hours total of resting time. Don't rush it—the layers won't develop right. Store dough in an airtight container between folds if you need to pause. The baked loaf keeps 3 days at room temp wrapped in a towel, or 1 week in the fridge. For longer storage, freeze slices between parchment paper. Reheat in a 350°F oven for 5 minutes to restore that crispy magic.
Why You'll Love This Recipe
- Pantry Staples Only: I swear by this recipe because it uses what I always have—flour, yeast, sugar, water, and salt. No specialty ingredients, no last-minute grocery runs. That warm, golden loaf comes from the basics, which means less stress and more baking.
- Golden Crust Magic: The moment it hits the oven, that crust turns into crispy perfection while the inside stays soft. Honestly, the sugar in the dough caramelizes just enough to give it a subtle sweetness that pairs with everything—jam, butter, or even just toasted and slathered with garlic butter.
- Weeknight Wonder: I make this when I forget to plan. It’s ready in under an hour, so it’s my go-to when I’m too tired for complicated recipes. Plus, it’s the kind of bread that disappears fast—perfect for when you’ve got hungry people (or just one very hungry you) to feed.
- Budget-Friendly Feast: A single batch costs pennies and stretches for days. I’ll slice it for toast, pack it for lunches, or even freeze half for when I’m too lazy to bake. It’s my secret weapon for making meals feel special without breaking the bank.
Step-by-step instructions for Angelo's bread recipe
Here's how to make bread with those signature flaky, pull-apart layers that'll have everyone reaching for seconds.
Activate the Yeast for Maximum Rise
In a small bowl, combine the 1.25 cups warm water (it should feel like bathwater, around 110°F), 1 tbsp granulated sugar, and 2.25 tsp active dry yeast. Let this sit for 5-10 minutes until it becomes frothy and bubbly—this tells you your yeast is alive and ready to work. If it doesn't bubble, your yeast might be dead, and you'll need to start over.
I always give the yeast this little head start because it makes such a difference in the final texture. The sugar feeds the yeast, helping it multiply and create those tiny air pockets that give the bread its light, airy quality. Don't skip this step—it's what sets up the bread for that perfect rise and flaky layers later on.
Mix the Dough Until It Comes Together
In a large bowl, combine the 5 cups all-purpose flour and 1.5 tsp salt. Make a well in the center and pour in the yeast mixture along with the 0.25 cup extra-virgin olive oil. Using a wooden spoon or your hands, mix everything together until it starts to come together into a shaggy dough.
This is where the magic begins. You'll notice the dough will be sticky at first—that's normal. Start kneading it right in the bowl for about 5 minutes, using your hands to work the dough until it becomes smooth and elastic. The dough should pull away from the sides of the bowl and not stick to your fingers. If it's still too sticky, add 1-2 tablespoons more flour just to help it come together better.
Let the Dough Rest and Develop Gluten
Lightly oil a clean bowl with a bit of olive oil, then transfer the dough to it. Cover the bowl with a damp kitchen towel or plastic wrap and let it rest at room temperature for 1 hour. This resting period is crucial—it allows the gluten to relax and the dough to become more manageable for shaping later.
During this time, you'll see the dough start to puff up slightly. This is the yeast doing its thing, creating those little air pockets that will give your bread its light texture. I like to set a timer so I don't forget about it. After the hour, the dough should be about 50% larger than when you started. If it hasn't risen at all, something might be off with your yeast or temperature—give it another 15 minutes before proceeding.
Shape and Chill the Dough for Flaky Layers
After the rest, turn the dough out onto a surface lightly dusted with 1 tbsp flour (that extra amount from your ingredients list). Gently shape it into a round loaf about 1 inch thick. This is where the flaky layers start to form—don't press too hard or you'll flatten those beautiful air pockets you've worked so hard to create.
Place the shaped dough on a baking sheet dusted with 0.5 cup cornmeal (this prevents sticking and adds a nice texture). Cover it again with a damp towel and refrigerate for at least 4 hours, or up to overnight. Chilling is non-negotiable for that perfect flaky texture. The cold temperature firms up the dough, making it easier to handle and preventing it from spreading too much in the oven. Plus, it gives the yeast time to develop flavor slowly.
Bake Until Golden and Crusty
Preheat your oven to 425°F with a baking stone or inverted baking sheet on the middle rack. This helps create steam, which is key for that crispy crust. Remove the chilled dough from the fridge and let it sit at room temperature for 10 minutes while the oven preheats.
Bake the bread for 20-25 minutes until it's deep golden brown and sounds hollow when you tap the bottom. The edges should pull away slightly from the baking sheet, and you should see those beautiful flaky layers starting to form. If the top browns too quickly, tent it loosely with foil to prevent over-browning while it finishes baking.
Let the bread cool on a wire rack for at least 15 minutes before slicing. This resting time is important—it allows the steam inside to escape and the layers to set properly. If you cut into it too soon, you'll end up with a gummy, uneven texture. Serve warm with butter or olive oil for the ultimate experience—those flaky layers are best enjoyed fresh from the oven.
Pro Tips For Making Angelo'S Bread
- Bloom the Yeast First: Skip mixing yeast into dry flour—dissolve it in warm water with sugar first, then let it foam for 5-10 minutes. I learned this the hard way after kneading dough with sluggish yeast and wondering why my bread never rose properly. This guarantees active yeast before it hits the flour.
- Measure Flour by Weight: Ditch the scooping—use a kitchen scale for 450g flour (or 3 ½ cups packed, but don’t lie to yourself). Too much flour makes dense bread, and this recipe’s light texture depends on the right ratio. I still catch myself eyeballing it, but the scale never fails.
- Don’t Rush the First Rise: Let the dough double in a warm spot (75°F/24°C) for at least 1–1.5 hours—no peeking or poking. I used to check every 20 minutes, collapsing the dough and stressing myself out for nothing. Patience here means a proper crumb.
- Shape Tightly, Rest Briefly: Roll the dough into a smooth, taut ball (like a volleyball, not a deflated soccer ball) and let it rest covered for 10 minutes before baking. This relaxes the gluten so it doesn’t fight you when expanding. My first loaves looked lopsided until I mastered this step.
Common mistakes when making perfect results
Skipping the Rest
One of the biggest mistakes is rushing the dough's rest time. The dough needs that 1-hour room-temperature rest after mixing to develop gluten properly. Skipping this step means you'll end up with a dense, chewy loaf instead of the light, airy texture Angelo's bread is famous for.
I've seen home bakers skip this because they're eager to shape and bake, but trust me—patience here pays off in the final texture. 💡
Over-Kneading the Dough
While kneading is essential, overdoing it will toughen the dough and destroy those delicate layers. Knead just until the dough pulls away from the bowl and feels smooth—about 5 minutes by hand.
I've made this mistake and ended up with bread that was more like a baguette than the tender, pull-apart texture we want. If the dough starts feeling resistant, you've gone too far.
Ignoring the Chill
The 4-hour refrigeration before baking is non-negotiable for those signature flaky layers. Without proper chilling, the dough will spread too much in the oven, losing its shape and those beautiful air pockets.
I once tried baking it right after shaping—big mistake! The bread flattened out and lost its characteristic texture. Think of chilling as a flavor and texture enhancer, not just a time-saver.
Using the Wrong Flour
While all-purpose flour works, it won't give you that professional, flaky texture. For best results, use King Arthur bread flour or Caputo Tipo 00 flour—both have higher protein content that develops gluten better.
I've tried this bread with store-brand flour, and while it's edible, it lacks that signature pull-apart magic. The difference is noticeable, especially in the layers and crust.
Overcrowding the Pan
Don't try to fit multiple loaves on one baking sheet—this will cause them to spread out and lose their shape. The dough needs room to rise properly in the oven.
I recommend using a half-sheet pan for one loaf, or a full sheet pan with space between multiple loaves. Overcrowding leads to uneven baking and a less impressive final product.
Baking Without Steam
The crispy crust comes from steam during baking. Without it, your bread will be flat and dense. Create steam by placing a baking stone in the oven or using an inverted baking sheet on the middle rack.
I also recommend spraying the oven walls with water just before baking. This simple trick makes a huge difference in that golden, crackly crust we all love. 🔥
Nutrition facts
Frequently asked questions
Why does Angelo's bread have those signature flaky layers?
The flaky layers come from the dough's folding technique during the 4-hour chill in the fridge. Each fold creates thin layers that separate during baking, while the steam from the oven creates crispy pockets. The longer chill also relaxes the gluten, making those layers more pronounced.
Can I make Angelo's bread without olive oil?
The classic recipe uses just flour, yeast, water, and salt—but you can skip the olive oil if you prefer. The oil adds richness, but the bread will still have that signature pull-apart texture. For extra flavor, try adding 1 tsp dried rosemary or 1 tbsp honey to the dough instead.
How do I know when the bread is fully baked?
Look for a deep golden brown crust and listen for a hollow sound when you tap the bottom. The edges should pull away slightly from the pan, and the internal temperature should reach 190°F. If the top browns too fast, tent it with foil for the last 5-10 minutes to prevent over-browning.
Can I freeze Angelo's bread?
Yes! Wrap individual slices in plastic wrap and place them in a freezer bag. Frozen slices stay fresh for 3 months. To revive, reheat in a 350°F oven for 5 minutes**—this restores the crispy crust and soft layers. For whole loaves, freeze before slicing and thaw at room temperature for 1-2 hours.
What’s the best way to store leftover bread?
Keep it in an airtight container at room temperature for 3 days, or refrigerate for 1 week wrapped in a clean kitchen towel. The towel prevents sogginess better than plastic. For longer storage, freeze slices as mentioned above. Reheat in the oven or toaster for the best texture.