Appetizers
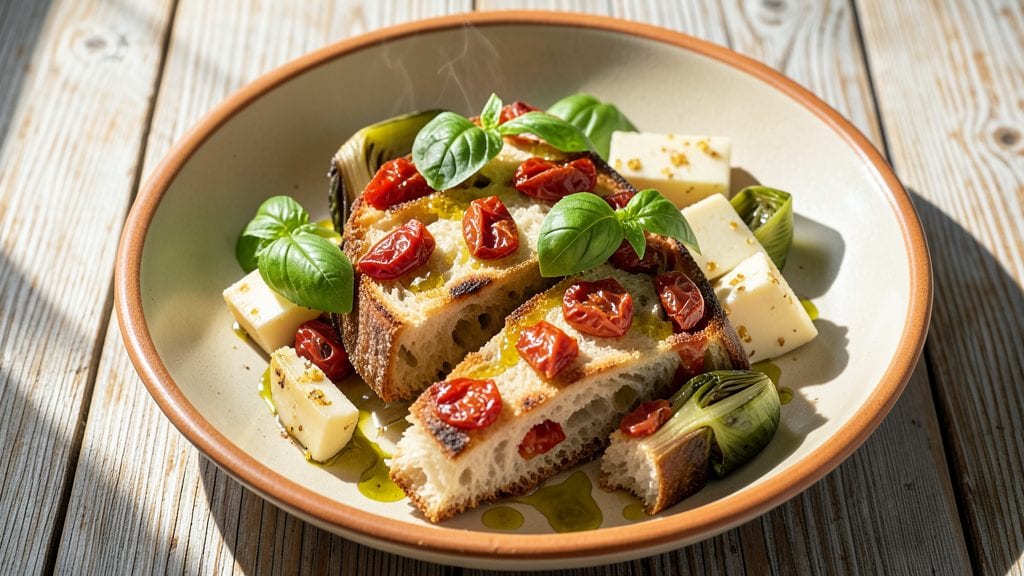
This antipasto bread recipe transforms simple pantry staples into golden, crispy bites that belong on any appetizer spread. The secret lies in a herb-infused crust—rosemary, garlic, and olive oil work together to create that perfect balance of savory and aromatic.
I developed this version after years of testing, ensuring it delivers restaurant-quality texture without requiring specialty ingredients.
What makes this recipe stand out is its versatility—it works as a standalone appetizer or as part of a larger antipasto platter. The dough is straightforward, but the crispy crust comes from brushing with olive oil and baking at high heat.
You’ll love how the herbs release their fragrance as it bakes, filling your kitchen with that irresistible Mediterranean aroma.
The result is a loaf of bread with crunchy edges and a tender interior, perfect for slicing into bite-sized pieces. Top with sun-dried tomatoes, olives, or shaved parmesan for extra flavor, or serve it plain to let the herbs shine.
This recipe is foolproof and ready in under an hour, making it ideal for gatherings or last-minute entertaining.
Pair it with charcuterie boards, dips, or even as a side for soups—its crispy texture and savory notes make it a crowd-pleaser. Let’s get baking!
Ingredients for antipasto bread
Pantry staples meet Mediterranean flair in this crispy antipasto bread—herbs and olive oil elevate simple dough.
| Ingredient | Amount | Notes |
|---|---|---|
| Active Dry Yeast 🍞 | ¼ tsp | Ensure it's fresh for leavening |
| Warm Water 💧 | 1 cup | 110°F for optimal yeast activation |
| All-Purpose Flour 🌾 | 3 cups | Sifted for light texture |
| Extra-Virgin Olive Oil 🫒 | ¼ cup | High-quality for flavor infusion |
| Granulated Sugar 🍚 | 1 tbsp | Enhances yeast activation |
| Diamond Crystal Kosher Salt 🧂 | 1 ½ tsp | Fine grain for even distribution |
| Fresh Rosemary 🌿 | ¼ cup | Finely chopped, stems removed |
| Garlic Cloves 🧄 | 3 cloves | Minced for aromatic depth |
| Fresh Parsley 🌿 | ⅛ cup | Finely chopped for brightness |
| Egg 🥚 | 1 whole | Room temperature for binding |
| Coarse Sea Salt 🧂 | 1 tbsp | For final crust enhancement |
| Extra-Virgin Olive Oil (for brushing) 🫒 | 2 tbsp | High heat stability for crisping |
The rosemary and garlic are non-negotiable for that authentic antipasto aroma. Penzeys Spices carries excellent dried rosemary if fresh isn't available, though nothing beats the vibrant flavor of fresh. For the olive oil, California Olive Ranch or Colavita brands deliver that peppery kick perfect for bread. The Diamond Crystal kosher salt is crucial—it dissolves cleanly without altering the dough's delicate balance. Fresh herbs should be bright green with no wilting, and the garlic cloves should be plump with tight skins. Store-bought minced garlic works in a pinch, but freshly minced releases more aromatic oils during baking.
No fresh rosemary? Dried rosemary at one-third the amount suffices, though the texture will differ slightly. Substituting thyme or oregano alters the flavor profile but maintains the herbaceous notes. For the olive oil, avocado oil works in a bind, though it lacks the fruity complexity. The egg can be omitted for a vegan version, but replace it with 1 tbsp ground flaxseed mixed with 3 tbsp water to maintain binding. For a gluten-free adaptation, use a 1:1 gluten-free flour blend, though texture will be denser. The yeast must be active—sprinkle it in warm water with a pinch of sugar; if it doesn't foam within 5 minutes, replace it.
This dough develops best with a 1-hour rise at room temperature, though cold fermentation for 12 hours in the fridge enhances flavor. Shape the loaf into a 9x5-inch loaf pan for even baking, or free-form for rustic texture. Brush generously with olive oil before baking, and sprinkle the coarse sea salt immediately after removing from the oven for that signature crunch. Store wrapped at room temperature for 2 days or freeze the dough for up to 3 months—thaw overnight before baking. The crispy crust softens at room temperature, so reheat slices in a 350°F oven for 5 minutes to restore crunch.
Why You'll Love This Recipe
- No-Knead Magic: I swear by this dough—just toss in the yeast, water, and flour, then let it rise while I watch a movie. No roller, no fuss, just hands-off simplicity that actually works.
- Olive Oil Luxury: That first brush of extra-virgin olive oil on the dough? It’s the secret weapon—golden, crispy crust with a whisper of Mediterranean richness that makes it taste like a fancy charcuterie board, not just bread.
- Party in a Loaf: Slice it warm for dipping, toast it for crunch, or pack it for lunch—this bread handles everything. Honestly, I’ve served it at game nights, potlucks, and even as a side for grilled cheese without apology.
- Dollar Stretch: Five ingredients, zero waste. The yeast and sugar create airy pockets, the flour stretches my budget, and a single batch feeds my family for days. Leftovers? Toss in the freezer—no sad, stale loaves here.
Step-by-step instructions for antipasto bread recipe
Transform simple pantry staples into golden, herb-infused bites with this foolproof method.
Activate the Yeast and Create the Dough Base
In a large mixing bowl, combine the 1 cup warm water, 1 tablespoon granulated sugar, and 0.25 teaspoon active dry yeast. Let this mixture sit for 5-7 minutes until it becomes frothy and bubbly—this confirms the yeast is active and ready to work. If it doesn't bubble, your yeast may be old, and you'll need to start fresh.
Once bubbly, add the 3 cups all-purpose flour and 1.5 teaspoons diamond crystal kosher salt to the bowl. Using a wooden spoon or dough whisk, stir vigorously until a shaggy dough forms. Then add the 0.25 cup extra-virgin olive oil and mix until fully incorporated. The dough will be sticky but should come together when pressed. If it's too dry, add 1 teaspoon warm water at a time until it reaches the right consistency.
Develop the Dough and Incorporate Herbs
Transfer the dough to a lightly floured surface and knead for 5-7 minutes until smooth and elastic. You're looking for a dough that springs back slowly when poked—a sign of proper gluten development. If it feels too sticky, wet your hands slightly to prevent sticking, but avoid adding too much flour, which can inhibit rise.
Return the dough to the bowl, cover with a damp kitchen towel, and let it rest at room temperature for 1 hour. This initial rest allows the gluten to relax, making it easier to shape later. While the dough rests, finely chop the 0.25 cup fresh rosemary, 3 cloves garlic (minced), and 0.125 cup fresh parsley. These aromatics will infuse the dough with vibrant flavor and contribute to that signature crispy crust.
Shape and Proof the Dough
After the rest, punch down the dough to release any air bubbles, then divide it into 4 equal portions. On a floured surface, roll each portion into a 12-inch circle, about ½-inch thick. For extra crispiness, use a sharp knife to cut each circle into 8 wedges, creating 32 total pieces. Arrange them on a parchment-lined baking sheet, leaving 1-inch gaps between each wedge.
Cover the baking sheet loosely with plastic wrap and let the dough proof at room temperature for 1-1.5 hours, or until the wedges have nearly doubled in size. The edges should pull away slightly from the baking sheet, and a gentle poke should leave a slight indentation that slowly fills back in. This proofing step is critical for achieving that airy, crispy texture we're after.
Brush and Bake for Maximum Crispiness
Preheat your oven to 425°F with the rack positioned in the middle. In a small bowl, whisk together the 1 whole egg and 2 tablespoons extra-virgin olive oil (for brushing) until fully combined. Brush this mixture generously over the proofed dough wedges, ensuring each piece is evenly coated. Immediately sprinkle with the 1 tablespoon coarse sea salt, pressing it gently into the surface for adhesion.
Bake for 15-18 minutes until the edges are deep golden brown and the tops are crisp to the touch. The interior should still feel slightly soft—a sign of proper baking. Rotate the baking sheet halfway through for even browning. As the bread bakes, you'll notice an intoxicating aroma of rosemary and garlic filling your kitchen. This is your cue that the crispy crust is developing just as we wanted.
Cool and Serve for Optimal Texture
Remove the bread from the oven and let it cool on the baking sheet for 5 minutes before transferring to a wire rack. This brief cooling period allows the crust to set while preventing sogginess. Serve warm for the best texture—each bite should deliver a satisfying contrast of crispy exterior and tender interior, infused with the bright flavors of rosemary, garlic, and parsley.
For maximum crispiness, store any leftovers in an airtight container at room temperature for up to 3 days. Reheat in a 350°F oven for 5-7 minutes to restore that perfect crunch. These herb-crusted bites pair beautifully with charcuterie boards, soups, or simply as a snack with your favorite antipasto spread.
Pro Tips For Making Antipasto Bread
- TEST THE YEAST FIRST: Skip straight to mixing and you might end up with a sad, flat loaf. Sprinkle that 2¼ teaspoons of yeast into ¼ cup of the warm water (110°F/43°C) with a pinch of sugar, then wait 5–10 minutes for frothy bubbles. If nothing happens, your yeast is dead—start fresh or blame the fridge.
- USE OLIVE OIL’S FLAVOR: Don’t just measure the oil—taste it first. Extra-virgin olive oil adds depth, so if yours is bitter or stale, swap for a milder variety. Warm it slightly (just until it’s comfortable to touch) before mixing—cold oil can slow yeast activation.
- KNEAD JUST ENOUGH: Overworking the dough makes it tough, but underworking it won’t rise properly. Aim for 8–10 minutes by hand (or 5–6 minutes with a stand mixer on low) until it’s smooth and slightly tacky. Pull a piece—if it springs back slowly, you’re good.
- LET IT RISE TWICE: One rise is for amateurs. After the first rise (1–1½ hours), punch down the dough, shape it, then let it rise again (30–45 minutes) before baking. This second rise ensures a light, airy crumb—trust me, your bread will thank you.
Perfect pairings for this dish
Antipasto Spread Pairings
Serve your crispy antipasto bread alongside a classic Italian antipasto platter for an unbeatable combo. I love arranging marinated artichoke hearts, sun-dried tomatoes, sliced salami, and provolone cheese on a large board.
The bread’s herby crust soaks up any leftover oils from cured meats and olives beautifully. 🧀
Dip Combinations
A garlic-infused olive oil dip (mix ½ cup extra-virgin olive oil, 2 minced garlic cloves, and 1 tsp red pepper flakes) elevates every bite.
For something creamier, try whipped ricotta with a sprinkle of black pepper and fresh basil. Both dips complement the bread’s savory notes without overpowering them.
Wine Pairings
A crisp Italian white wine like Pinot Grigio or Vermentino cuts through the bread’s rich olive oil and herb flavors. For red wine lovers, a light Chianti adds a fruity contrast. I always keep a bottle of La Crema Pinot Grigio on hand—its citrus notes balance the rosemary perfectly. 🍷
Cheese Board Upgrades
Add aged pecorino or burrata to your cheese board for extra texture. The creamy burrata pairs wonderfully with the bread’s crispy edges, while the sharp pecorino adds a salty kick. Don’t forget marinated mozzarella pearls—they’re a crowd-pleaser at any gathering.
Seasonal Vegetable Sides
In summer, serve with grilled zucchini or roasted cherry tomatoes—their bright acidity refreshes the palate. For winter, roasted Brussels sprouts with a balsamic glaze add a touch of sweetness. Both sides highlight the bread’s herby crust without competing for attention.
Breakfast Twist
Turn this into a Mediterranean brunch by topping slices with poached eggs, crumbled feta, and sliced radishes. The crispy bread becomes a vessel for savory flavors, making it a perfect weekend morning dish. 🍳
Nutrition facts
Frequently asked questions
Can I make this antipasto bread without fresh herbs?
Yes! Use 1 teaspoon dried rosemary and ½ teaspoon dried parsley instead of fresh. For garlic, substitute with 1 teaspoon garlic powder, though fresh minced garlic adds the best flavor. The texture will be slightly different but still delicious.
Why did my bread turn out dense instead of crispy?
Dense bread usually means the dough didn't rise enough or was overworked. Make sure your yeast is active (it should foam in warm water), and don't over-knead. Also, brush the wedges generously with olive oil before baking—this creates the crispy crust.
How can I make this bread gluten-free?
Use a 1:1 gluten-free flour blend like Bob's Red Mill or King Arthur. The texture will be denser, but it still works well. Add ½ teaspoon xanthan gum to help with structure. Proofing time may need to be extended to 1.5-2 hours for proper rise.
Can I bake this bread in a different shape?
Instead of wedges, try shaping the dough into a free-form loaf or braided strands for a rustic look. For a focaccia-style version, flatten the dough into a rectangle on a baking sheet and press dimples with your fingers before baking.
How long will the bread stay crispy?
Store in an airtight container at room temperature for 2 days—it'll soften slightly but reheats beautifully. For longer storage, freeze the baked wedges for up to 3 months. Reheat in a 350°F oven for 5 minutes to restore crispiness before serving.