Side Dishes
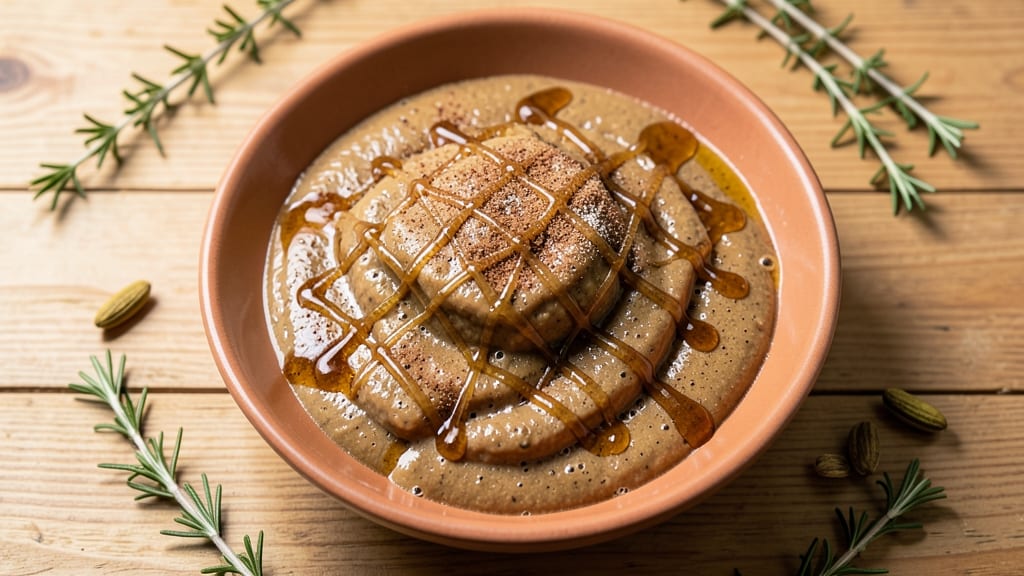
Transforming canned bananas into this caramelized spiced vanilla dessert is one of those kitchen discoveries that changes how you think about pantry staples.
The process is surprisingly simple—just a few ingredients and 30 minutes of hands-on time—but the result is a rich, velvety dessert with deep caramel notes and warm vanilla spices that tastes like it belongs in a bakery case.
I developed this recipe after realizing how versatile canned bananas can be beyond traditional banana bread.
The secret lies in the slow caramelization and the spice blend—cinnamon, nutmeg, and a touch of cardamom create layers of warmth that complement the natural sweetness of the bananas. Unlike fresh bananas, canned ones hold their shape beautifully while absorbing flavors, making them ideal for this foolproof method.
The texture is smooth yet slightly chewy, with a glossy caramelized top that adds visual appeal.
What you'll end up with is a dessert that's rich enough for a special occasion but simple enough for a weeknight treat.
The spiced vanilla twist elevates the humble canned banana into something sophisticated, perfect for serving with a dollop of coconut whipped cream or a scoop of vanilla ice cream. This recipe proves that pantry ingredients can create restaurant-quality results.
While this version is designed as a dessert, the technique works equally well for savory applications—think caramelized banana glaze for pancakes or a sweet-savory topping for oatmeal. The possibilities are limited only by your creativity. Let's get started with this versatile recipe that brings new life to canned bananas.
Ingredients for canned bananas
Just 11 pantry staples transform canned bananas into a velvety spiced dessert with bakery-style caramelized richness.
| Ingredient | Amount | Notes |
|---|---|---|
| Canned Bananas in Syrup 🍌 | 14 oz | Drained, syrup reserved for caramel |
| Extra-Virgin Coconut Oil 🥥 | ½ cup | For caramelizing and richness |
| Pure Maple Syrup 🍯 | ½ cup | Grade B for deeper caramel flavor |
| Ground Cinnamon 🌿 | 1 ½ tbsp | Ceylon preferred for delicate flavor |
| Ground Nutmeg 🌿 | ½ tsp | Freshly grated for best aroma |
| Ground Cardamom 🌿 | ¼ tsp | Lightly toasted for warmth |
| Pure Vanilla Extract 🌸 | 1 tbsp | Bourbon or Madagascar preferred |
| Coconut Milk 🥛 | ½ cup | Full-fat for creaminess |
| Vegan Vanilla Ice Cream 🍦 | 1 cup | For serving, optional |
| Toasted Coconut Flakes 🥥 | ¼ cup | For garnish |
| Sea Salt 🧂 | ¼ tsp | Fine grain for finishing |
Canned bananas are the star here—Libby's or Del Monte brands work perfectly, but any quality canned bananas will do. The syrup from the can isn't wasted; it's part of the caramelization process. For the spices, Penzeys or Spicewalla offer premium ground options, but basic grocery store spices work fine if freshly ground. Cardamom is key for that warm, aromatic depth—don't skip it. The coconut oil should be unrefined for best flavor, and maple syrup should be Grade B for its deeper caramel notes. If you can't find Grade B, Grade A works but lacks that rich caramel undertone.
No cardamom? Allspice at half the amount adds warmth without the same complexity. Running short on coconut milk? Full-fat cashew cream works beautifully—just blend soaked cashews with water until smooth. Prefer a different ice cream? Dairy-free vanilla bean ice cream elevates the dish further. The coconut flakes should be toasted in a dry pan until golden for maximum crunch. For extra richness, blend a few dates with warm water to create a caramel-like sauce to drizzle on top—it adds a subtle depth that pairs perfectly with the spiced bananas.
This dessert keeps beautifully in the fridge for 5 days—the flavors actually deepen over time. For longer storage, freeze individual portions in airtight containers for up to 3 months. The caramelized top can be reheated gently in the microwave for 20 seconds to restore its glossy finish. Serve warm or at room temperature for the best texture contrast. The combination of warm spices and cool coconut ice cream makes this a showstopper for any occasion—no one will guess it's made from canned bananas.
Why You'll Love This Recipe
- No Pantry Panic: I keep a can of these bananas in syrup just for lazy mornings—no peeling, no browning, just open and go. The syrup’s already sweetened, so I’m not scrambling for extra sugar or honey.
- Spiced Warmth Hit: That first bite of coconut oil caramelized with cinnamon and nutmeg? It’s like dessert sneaking into breakfast. Honestly, I’ve made this for brunch, but I’ve also eaten it straight from the pan at midnight—no judgment.
- Breakfast or Snack: Slather it on toast for a quick bite, fold into overnight oats, or dollop over yogurt—it’s my go-to when I need something rich but not heavy. Even my coffee-drinking husband asks for it now.
- Zero-Waste Luxury: A single can lasts me a week between meals and leftovers, and I’m not exaggerating. The syrup reduces to a glossy glaze, so every drop gets used, and the cost? A fraction of fresh bananas. (Yes, even on a Tuesday night.)
Step-by-step instructions for canned bananas recipe: caramelized sweetness with spiced vanilla twist
Transform simple pantry ingredients into a rich, spiced banana caramel with this straightforward method.
Prepare the Banana Caramel Base
Drain the 14 oz canned bananas in syrup, reserving the syrup in a small bowl. In a heavy-bottomed saucepan, combine the drained bananas, 0.5 cup pure maple syrup, and 0.5 cup extra-virgin coconut oil over medium-low heat. Stir gently until the mixture reaches 170°F—this ensures the bananas soften completely without burning. You'll notice the syrup begins to thicken slightly as it incorporates the banana's natural sugars.
Here's the thing—this low-and-slow approach prevents the coconut oil from scorching while allowing the bananas to break down into a velvety texture. If the mixture starts to bubble vigorously, reduce the heat immediately to maintain even cooking. The goal is a smooth, syrupy consistency that coats the back of a spoon.
Build the Spiced Flavor Profile
Once the banana mixture reaches 170°F, remove it from heat and whisk in the 1.5 tbsp ground cinnamon, 0.5 tsp ground nutmeg, and 0.25 tsp ground cardamom. Return the pan to low heat and stir continuously for 3-4 minutes until the spices are fully incorporated and the aroma fills your kitchen. This step is where the magic happens—the spices bloom and infuse the caramel with their distinct warmth.
I always add the spices off the heat first to prevent burning, then gently reheat to meld them. If you notice the mixture separating, simply whisk vigorously to re-emulsify. The reserved syrup from the canned bananas will help maintain cohesion—use it sparingly if needed to adjust thickness.
Infuse with Vanilla and Coconut Milk
Return the spiced caramel to medium-low heat and stir in the 1 tbsp pure vanilla extract and 0.5 cup coconut milk. Simmer gently for 5-6 minutes, stirring frequently, until the mixture thickens to a pudding-like consistency. You're looking for a texture that coats a spoon but still flows smoothly—this indicates proper emulsification. The coconut milk adds creaminess while balancing the sweetness.
Taste the mixture and adjust seasoning with 0.25 tsp sea salt if needed. The salt enhances the natural sweetness and rounds out the spice profile. If the caramel becomes too thick, whisk in 1-2 teaspoons of water to achieve the desired consistency. This step ensures your final product has the perfect balance of richness and flavor.
Serve with Optional Ice Cream Topping
Transfer the finished caramel to a serving dish and let it cool to room temperature. The texture will firm up slightly as it cools, creating a beautiful, glossy finish. For an elegant presentation, drizzle any remaining reserved syrup from the canned bananas over the top. The syrup adds a glossy sheen and subtle banana flavor that complements the spiced caramel.
Serve warm or at room temperature, optionally topped with 1 cup vegan vanilla ice cream and 0.25 cup toasted coconut flakes. The ice cream provides a cool contrast to the warm, spiced caramel, while the coconut flakes add a delightful crunch. This combination transforms the caramel into a decadent dessert that's perfect for sharing or enjoying solo.
Store for Later Enjoyment
For leftovers, transfer the caramel to an airtight container and refrigerate for up to 5 days. To reheat, warm gently in a saucepan over low heat, stirring frequently until smooth. If the caramel thickens upon reheating, whisk in a splash of coconut milk or water to restore its original consistency. The spiced flavors actually deepen slightly when reheated, making this a versatile dessert for spontaneous cravings.
This recipe delivers a sophisticated dessert with minimal effort—ideal for using pantry staples creatively. The balance of sweet, spiced, and creamy elements makes it a standout treat that's sure to impress. Enjoy it as-is, or experiment with variations like adding a pinch of cayenne for a subtle kick.
Pro Tips For Making Canned Bananas
- Drain, Don’t Dump: Open the can and pour the bananas into a colander—don’t just tip the whole thing. The syrup is thick and clings like glue; shaking the can first loosens it, so you waste less and save time scraping the bottom. (I learned this the hard way after throwing out half a cup of sticky syrup.)
- Warm the Syrup: Heat the maple syrup and coconut oil together over low heat until just warm—no boiling. Cold syrup separates and makes the bananas taste dull, while hot oil burns faster than you’d expect. A quick 30-second warm-up blends flavors better than dumping everything cold.
- Toast the Spices: Bloom the cinnamon and nutmeg in the coconut oil for 10 seconds before adding the bananas. This wakes up their aroma and prevents a dusty, one-dimensional flavor. Skip this, and your dish tastes like dessert filling instead of something special.
- Simmer, Don’t Boil: Keep the heat at a gentle simmer—tiny bubbles, occasional swirls. Boiling turns the syrup into glue and makes the bananas mushy. If it’s too thick, add a splash of water, not more syrup. (Yes, even if you’re impatient like me.)
Storing and reheating your canned bananas
Refrigerator Storage
Store your spiced banana caramel in an airtight container with a lid for up to 5 days in the refrigerator. The flavors actually deepen over time, making it taste even more complex the next day.
I use glass Pyrex containers because they preserve the caramel's glossy finish better than plastic. Let it cool completely before sealing to prevent condensation from forming on the surface. 💫
Freezer Preservation
For longer storage, portion the caramel into silicone molds or small airtight containers and freeze for up to 3 months. The texture remains creamy when thawed properly—just let it sit at room temperature for 10-15 minutes before serving.
If it thickens slightly after freezing, whisk in 1-2 teaspoons of coconut milk to restore its original consistency. Label containers with the date to track freshness.
Reheating Methods
For the best results, reheat in a lightly oiled saucepan over low heat for 3-5 minutes, stirring constantly until smooth. Avoid microwaving unless necessary—it can create a grainy texture.
If using the microwave, heat in 10-second bursts on 50% power, stirring between each interval. The caramel should return to its velvety state with minimal effort. ⏰
Texture Restoration
If your caramel thickens upon reheating, simply whisk in 1-2 teaspoons of warm water or coconut milk until it reaches a spoonable consistency. The key is patience—don't rush the process.
For a restaurant-quality finish, drizzle with a little reserved banana syrup from the can to restore that glossy sheen. This trick works wonders for presentation too!
Serving Warm vs. Cold
Serve this caramel warm for a comforting dessert experience, especially when paired with vanilla ice cream. If serving cold, chill the caramel for 1 hour before scooping—it develops a firmer, pudding-like texture that's perfect for spooning. The contrast between warm and cold elements makes this dessert uniquely satisfying. 🍦
Garnish Refreshers
Before serving, revive the presentation with toasted coconut flakes or a sprinkle of sea salt. For an extra touch, add a few drops of vanilla extract or a pinch of cinnamon to enhance the aroma.
These finishing touches elevate the dish from homemade to restaurant-worthy in seconds. The caramel's rich flavor deserves this final flourish! ✨
Nutrition facts
Frequently asked questions about canned banana desserts
Why do canned bananas work better than fresh for this recipe?
The syrup preserves the bananas' natural sweetness while keeping their shape perfectly for caramelization. Unlike fresh bananas, they don't turn to mush when heated, creating that ideal velvety texture. Plus, the syrup adds depth to the caramel without extra sugar!
Can I use this recipe for savory dishes instead of dessert?
Try using the caramelized banana mixture as a glaze for pancakes, oatmeal, or even drizzled over toast with a sprinkle of sea salt. The spices add warmth that pairs beautifully with savory flavors. For a twist, add a pinch of cayenne to the caramel for a sweet-spicy contrast.
What if I don't have cardamom in my spice rack?
No problem! Swap it with 0.25 tsp allspice or 0.5 tsp pumpkin pie spice for a similar warmth. The cinnamon and nutmeg will still shine, though cardamom gives that unique aromatic depth. Don't skip the spices entirely—they're what make this dessert special!
How do I fix if my caramel gets too thick?
Simply whisk in 1-2 teaspoons of warm water or coconut milk until smooth. For extra richness, use the reserved banana syrup from the can. Stir gently to avoid lumps, and your caramel will return to its perfect spoonable consistency. Patience is key—don't rush it!
Can I make this recipe without coconut products?
Yes! Replace the coconut oil with butter or olive oil and use cashew cream> (blend soaked cashews with water) instead of coconut milk. The flavor will be slightly different but still delicious. For a dairy-free option, use oat milk> with a pinch of salt to balance the sweetness.