Beverages
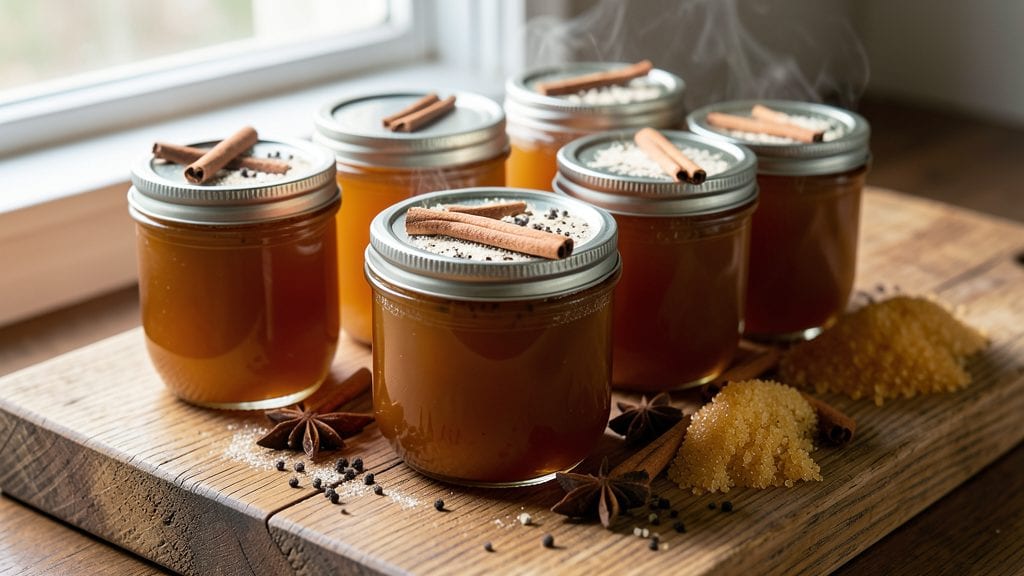
This canning apple cider recipe captures the essence of autumn—transforming fresh-picked apples into spiced, golden goodness you can savor all year. This canning apple cider recipe delivers restaurant-quality warmth in every jar, with proper USDA-approved techniques ensuring safety and perfect balance.
The process requires precision—sterile jars, exact processing times, and proper acidification—but the results are worth every step.
What makes this recipe professional-grade is the attention to detail during preparation. We'll use fresh apple cider as our base, carefully measured spices for depth, and proper canning methods to maintain quality.
The water bath process ensures all jars seal correctly while preserving that rich, aromatic flavor you'd expect from a fresh batch. Safety comes first, which is why we'll include critical pH testing guidelines to prevent spoilage.
By following these instructions, you'll end up with beautifully sealed jars of spiced apple cider that taste like autumn any time of year. The aroma alone will transport you to a cozy orchard, while the perfect balance of sweetness and spice makes it ideal for sipping or cooking.
Each jar contains about 12 ounces of finished product, ready to be enjoyed hot or cold.
This method produces a drinkable product that rivals store-bought versions, with none of the preservatives. The recipe yields approximately 7 quarts of finished cider, perfect for gifting or stocking your pantry.
Let's get started with the professional canning process that will keep your cider safe and delicious for up to a year.
Ingredients for canning apple cider
Seven quarts of autumn in every jar—just these ingredients transform into spiced cider magic.
| Ingredient | Amount | Notes |
|---|---|---|
| Fresh Apple Cider 🍎 | 7 cups | Unpasteurized, homemade preferred |
| Granulated Sugar 🍚 | 2 cups | White or brown preferred |
| Ground Cinnamon 🌿 | 2 tbsp | Freshly ground for best flavor |
| Ground Nutmeg 🌿 | 1 tsp | Freshly grated preferred |
| Ground Cloves 🌶️ | ½ tsp | Whole cloves crushed first |
| Ground Allspice 🌶️ | ½ tsp | Or substitute 1 cinnamon stick |
| Salt 🧂 | 1 tsp | Kosher or sea salt |
| Lemon Juice 🍋 | ½ cup | Freshly squeezed, acidifies |
| Pint-Sized Canning Jars 🍶 | 7 pieces | Mason jars with bands |
| Canning Lids 🔒 | 7 pieces | New lids for sealing |
| Canning Rings 🔄 | 7 pieces | For jar closure |
| White Vinegar 🍶 | 1 tbsp | For jar sterilization |
The apple cider is the star—homemade is ideal, but store-bought works in a pinch. Look for unpasteurized cider at local orchards or farmers markets for that fresh-picked flavor. Sugar balances the tartness, so don't skimp here. Trader Joe's has great organic sugar if you want to splurge. The spices? Freshly ground makes all the difference—Penzeys sells pre-ground blends, but whole spices crushed in a spice grinder taste like heaven. And that lemon juice? Critical for acidification—USDA guidelines require it for safe canning.
No fresh cider? Apple juice works too, but add 1 extra tablespoon of lemon juice per quart. Running low on allspice? Extra cinnamon does the trick. The vinegar is for sterilizing jars—white vinegar is standard, but apple cider vinegar adds subtle flavor. For the jars, Ball or Kerr brands are the gold standard. New lids are non-negotiable—old lids won't seal properly. And if you're short on jars, pint-sized ones make perfect gifts. The sugar can be swapped for honey if you prefer, but it won't caramelize the same way.
Sterilize jars and lids in boiling water for 10 minutes—keep them hot until filling. The finished cider keeps for 1 year unopened in a cool, dark place. Once opened, refrigerate and consume within 1 week. I always label mine with the date—sharpie on the lid works great. The aroma alone makes these jars irresistible. Perfect for holiday gifts or cozy winter nights by the fireplace.
Why You'll Love This Recipe
- Here’s what sold me: one batch lasts weeks. Store jars in the pantry, and you’ve got a backup for parties, sick days, or lazy Sundays. Plus, it’s cheaper than buying pre-canned—my wallet (and my taste buds) thank me.
- Pantry-Friendly Magic: I’ll be real—this recipe uses stuff I already have. Fresh cider, sugar, and those warm spices (cinnamon, nutmeg, cloves) that sit in my cabinet for months. No fancy ingredients, no last-minute grocery runs. Just open jars, stir, and can—done.
- Spice-Spiked Comfort: That first sip? Pure nostalgia. The cinnamon and cloves turn ordinary cider into something cozy, like autumn in a bottle. Honestly, it tastes like a hug—sweet, warm, and just a little mysterious.
- Holiday or Sip: Between us, this cider is my go-to for everything. Pour it over ice for a summer drink, warm it for Thanksgiving, or even use it in baking. The versatility is ridiculous—no excuses not to make it.
Step-by-step instructions for canning apple cider
Transform fresh apple cider into spiced autumn treasure with this foolproof canning method.
Sterilize Jars and Prepare the Spiced Mixture
First, wash the 7 pieces pint-sized canning jars, 7 pieces canning lids, and 7 pieces canning rings in hot, soapy water. Then place the jars in a large pot and cover with water. Bring to a boil for 10 minutes to sterilize completely. Meanwhile, combine 2 cups granulated sugar, 2 tablespoons ground cinnamon, 1 teaspoon ground nutmeg, 0.5 teaspoon ground cloves, 0.5 teaspoon ground allspice, and 1 teaspoon salt in a large bowl. Mix well to create your spice blend.
This step ensures your jars are completely clean and free of bacteria, which is critical for safe canning. The spice mixture will infuse the cider with warm, aromatic flavors that make every sip feel like autumn in a jar. Keep the sterilized jars hot until you're ready to fill them.
Combine Cider and Spices
In a large stockpot, combine 7 cups fresh apple cider and 0.5 cup lemon juice. Bring the mixture to a gentle boil over medium heat, stirring occasionally. Once boiling, reduce heat to medium-low and let it simmer for 10 minutes to help dissolve the sugar completely. Remove from heat and gradually whisk in the spice mixture until fully incorporated.
The lemon juice is essential here—it acts as a natural preservative and balances the sweetness of the cider. As the mixture simmers, you'll notice the spices begin to release their aromatic oils, filling your kitchen with that cozy autumn scent. Let the mixture cool slightly before filling the jars—this prevents cracking from sudden temperature changes.
Fill and Seal the Jars
Using a large ladle or funnel, carefully fill each of the 7 pieces pint-sized canning jars with the hot cider mixture, leaving about 1 inch of headspace at the top. Wipe the rims of the jars with a clean, damp cloth to ensure a proper seal. Place a canning lid on each jar and screw on a canning ring until it's fingertip-tight.
This headspace is crucial—it allows the cider to expand as it heats during processing without causing the jars to burst. The slight tightness on the rings helps create an airtight seal that preserves the cider for months. Work quickly but carefully to maintain the temperature of the cider and jars.
Process the Jars in a Water Bath
Place the filled jars into a canning rack in a large stockpot, ensuring they're completely submerged in water. Cover the jars with 2 inches of water and bring to a rolling boil. Once boiling, process the jars for 15 minutes at 212°F (or 100°C). This heat kills any remaining bacteria and ensures your cider stays safe to drink for months.
During this time, you'll hear the satisfying ping as the lids seal. If a jar doesn't seal properly, it can be refrigerated and used within a week. Keep the pot at a full boil throughout the processing time—any interruption can compromise the seal. After processing, carefully remove the jars and let them cool undisturbed for 12-24 hours before checking the seals.
Store and Enjoy Your Canned Cider
Once the jars have cooled completely, check the seals by pressing down on the center of each lid. If it doesn't pop back up, the jar is properly sealed. Remove the canning rings and label the jars with the date. Store them in a cool, dark place for up to 1 year. When ready to enjoy, simply open a jar and pour the warm, spiced cider over ice for a refreshing autumn drink.
The result is a jar of pure autumn magic—rich, spiced cider that captures the essence of harvest season. Whether you sip it warm on a chilly evening or use it in recipes, this homemade cider is a taste of comfort you'll want to preserve all year long.
Pro Tips For Making Canning Apple Cider
- Strain Twice: Pour the hot cider through a fine-mesh sieve after adding spices, then strain again through cheesecloth. I learned this the hard way—sediment ruins jars faster than you’d think, and that first strain only catches the obvious bits.
- Sugar First: Dissolve the sugar in a splash of hot cider before dumping it all in. I used to just toss it in raw, and half the time it’d settle at the bottom of the jars like a sad, grainy layer. Takes 2 minutes but makes a real difference.
- Skip the Boil Rush: Let the cider simmer slowly for 10–15 minutes after adding spices—don’t crank the heat just to fill jars fast. Rushing means under-extracted flavor and spices that sink like rocks instead of blending in evenly.
- Spice Weighs More: Measure spices by weight (¼ tsp each) instead of volume—those tiny scoops from the jar are not accurate. I was skeptical until I tried it: the first batch tasted flat, the second batch had perfect warmth. Worth the scale.
Creative variations of these flavors
Spiced Rum Infusion
Transform your cider into a boozy delight by adding 1 cup dark rum (like Kraken Black Spiced Rum) to the simmering mixture in Step 2. The warm spices and rum create a perfect harmony—ideal for holiday cocktails.
Let the rum infuse for 5 extra minutes before filling jars. For stronger flavor, increase to 1.5 cups rum and process jars for 20 minutes in the water bath. 🍹
Apple Pie Spice Twist
Swap the traditional spice blend for a homemade apple pie spice mix—combine 3 tbsp cinnamon, 1 tbsp nutmeg, 1 tbsp ginger, and ½ tsp cloves. This variation adds a cozy, dessert-like warmth that pairs perfectly with cinnamon rolls or vanilla ice cream.
Use the same 1-inch headspace and processing time for safety. The extra ginger gives it a subtle kick that kids and adults love. 🍏
Dry Spice Packet Version
Create individual dry spice packets for quick use later. Mix 1 tbsp cinnamon, ½ tsp nutmeg, ¼ tsp cloves, and ¼ tsp allspice in small muslin bags or airtight containers. Store these packets in your pantry—just add 1 packet per quart of cider when reheating.
Perfect for busy days when you want that spiced cider flavor without measuring spices. These packets keep for 6 months in a cool, dark place. ✨
Winter Citrus Boost
Brighten up your cider with ½ cup fresh orange juice and zest of 1 orange added during the simmering phase. The citrus cuts through the sweetness and adds a refreshing twist. For extra zing, add 1 tsp grated fresh ginger while simmering.
This variation works beautifully with roasted pork or as a festive mocktail base. The orange zest also makes a stunning garnish when serving. 🍊
Smoky Maple Variation
Add depth with ¼ cup pure maple syrup and 1 smoked salt (like Maldon Smoked Salt) during the simmering phase. The smoky-sweet flavor profile elevates this cider to a gourmet level. Use ½ tsp smoked salt per quart and adjust to taste.
This version pairs exceptionally well with smoked meats or as a cozy drink by the fireplace. The maple syrup also helps caramelize slightly during processing for extra richness. 🌲
Herbal Tea Infusion
For a sophisticated twist, steep 2 chamomile tea bags and 1 cinnamon stick in the cider while simmering. Remove before filling jars to avoid bitterness. This herbal infusion adds a floral note that balances the spices beautifully.
Perfect for those who enjoy a lighter, more complex cider. The chamomile also makes this version particularly soothing when served warm. 🌿
Nutrition facts
Frequently asked questions
Can I use store-bought apple juice instead of fresh cider?
Yes, but you'll need to adjust the acidity. Store-bought apple juice lacks natural acidity, so add 1 extra tablespoon of lemon juice per quart to meet USDA safety standards. Fresh cider has more natural pH balance, but this adjustment keeps your canned product safe. Always test pH if unsure—it should be below 4.6 for safe canning.
Why does my canned cider smell like vinegar?
This usually means fermentation occurred during processing. Check your processing time—jars must process for the full 15 minutes at 212°F. If a jar didn't seal properly, the cider may have fermented. Discard any jars that smell off, bulge, or leak. Always use new lids and ensure complete submersion during water bath processing.
How do I know if my jars sealed correctly?
After cooling 12-24 hours, press the center of each lid—if it doesn't pop back up, the seal is good. You'll also hear a satisfying ping during processing. Unsealed jars can be refrigerated and used within 1 week. For extra security, store sealed jars in a cool, dark place away from direct sunlight.
Can I add alcohol after canning?
No, adding alcohol after canning creates dangerous pressure buildup. For boozy cider, infuse the alcohol during the simmering phase (like the rum variation) and process for 20 minutes instead of 15. The alcohol content helps preserve flavor but doesn't replace proper processing. Never add alcohol to already sealed jars.
What's the best way to reheat canned apple cider?
Gently warm on the stovetop over low heat until steaming (about 5-7 minutes). Never microwave—it creates hot spots that can ruin the texture. For best results, transfer to a saucepan with 1 cup water and simmer until heated through. Stir occasionally to distribute flavors evenly.