Desserts
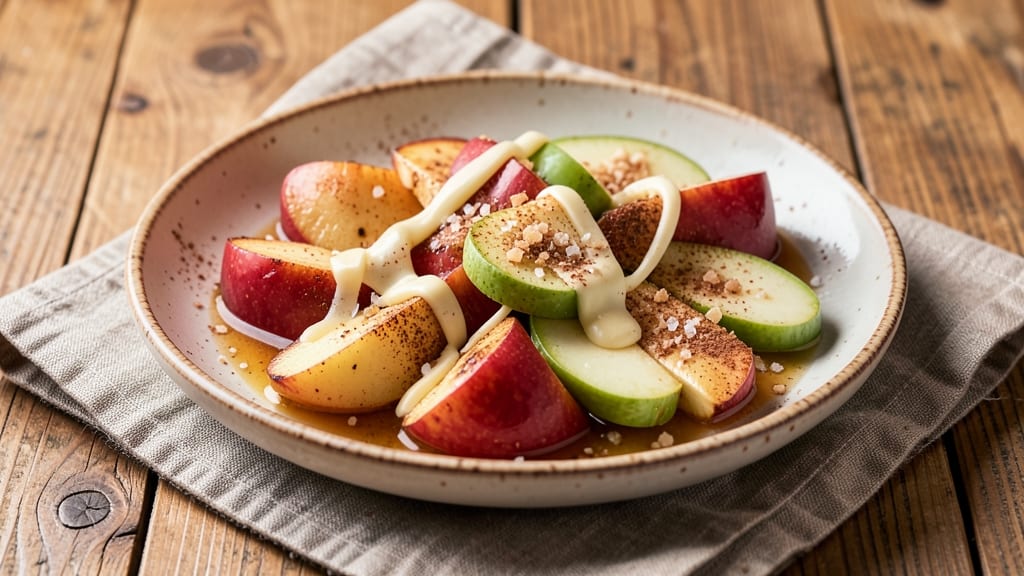
Caramelizing apples transforms simple fruit into a buttery, spice-kissed dessert that feels like autumn in every bite. The process is straightforward—apples simmer in a sweetened butter and spice mixture until tender and golden, creating a dish that pairs perfectly with vanilla ice cream or even savory pork.
I developed this method after realizing how quickly store-bought caramelized apples lose their texture, so I focused on keeping them crisp at the edges and tender inside while building deep, warm flavors.
This recipe relies on just five key ingredients: apples, butter, brown sugar, cinnamon, and a pinch of salt—all combined in one pan for effortless cleanup.
The secret lies in using a mix of apples (like Honeycrisp and Granny Smith) for the right balance of sweetness and tartness, and cooking them low and slow until they release their natural juices and caramelize beautifully.
The result is a dish that’s restaurant-quality but takes less than 30 minutes of active time.
What makes this recipe stand out is its versatility—serve it warm as a standalone dessert, pair it with pork chops for a holiday meal, or even stir it into oatmeal for a cozy breakfast.
The aroma alone will fill your kitchen with warmth, and the texture—crisp edges with a soft, melting center—is impossible to resist. Once you try this method, you’ll never buy pre-made caramelized apples again.
For extra depth, I recommend adding a sprinkle of toasted nuts or a drizzle of honey before serving, but the basic recipe delivers bold, comforting flavors on its own. Whether you’re hosting a dinner party or craving a simple treat, this one-pan dessert is the answer. Let’s get cooking!
Ingredients for caramelizing apples
Five simple ingredients transform crisp apples into buttery, spiced perfection in one pan.
| Ingredient | Amount | Notes |
|---|---|---|
| Honeycrisp Apples 🍎 | 2 whole | Peeled, cored, sliced into wedges |
| Granny Smith Apples 🍎 | 2 whole | Peeled, cored, sliced into wedges |
| Unsalted Butter 🧈 | ½ cup | Cold, cubed for even melting |
| Light Brown Sugar 🍚 | ½ cup | Packed, not spooned |
| Ground Cinnamon 🍃 | 2 tsp | Freshly ground preferred |
| Sea Salt 🧂 | ½ tsp | Fine grain preferred |
| Vanilla Extract 🍯 | 1 tsp | Pure vanilla for depth |
| Lemon Juice 🍋 | 1 tbsp | Freshly squeezed |
The apples are everything here—Honeycrisp for sweetness, Granny Smith for tartness. Buy them fresh (the good stuff, not pre-sliced), and slice them just before cooking so they don’t brown. I always grab mine from Whole Foods or the local farmers market if they’re in season—those apples have way more flavor. If you can only find one variety, use Honeycrisp. The butter? Use unsalted—you’re controlling the salt here, and salted butter can make the dish taste uneven. Cut it into small cubes so it melts evenly without clumping.
No brown sugar? White sugar plus a pinch of molasses works in a pinch. Short on vanilla? Vanilla bean paste is richer, but regular extract is fine. The lemon juice keeps the apples from turning gray—don’t skip it. Want extra warmth? Add half a tsp of nutmeg. For a savory twist, swap the vanilla for a splash of apple cider and serve with pork. And if you’re feeling fancy, toss in a handful of pecans at the end—they toast up beautifully in the residual heat.
This keeps for 3 days in the fridge, but honestly, it’s best eaten fresh. Store in an airtight container with a paper towel to absorb any moisture. Reheats beautifully—just warm in a skillet for 2-3 minutes until bubbly. I like to portion mine into small jars so I can grab a serving straight from the fridge. Freezes well too, but the texture gets softer after thawing. Perfect for a quick dessert or breakfast topping—just add a scoop of ice cream or a drizzle of honey.
Why You'll Love This Recipe
- Here’s what sold me: the crisp-tender apples caramelized with brown sugar until they’re sticky and glossy, while the butter adds this rich, velvety contrast. Honestly, the first bite makes me close my eyes—it’s that good.
- One-Pan Magic: I swear by this recipe because it’s literally hands-off after the initial chop. Toss those Honeycrisp and Granny Smith wedges with butter, sugar, and cinnamon, then let the oven do the work—no flipping, no fuss, just golden perfection.
- Sweet-Savory Balance: Here’s what sold me: the crisp-tender apples caramelized with brown sugar until they’re sticky and glossy, while the butter adds this rich, velvety contrast. Honestly, the first bite makes me close my eyes—it’s that good.
- Weeknight or Holiday: Between us, this is my go-to for anything. Serve it warm over vanilla ice cream for a lazy summer night, or plate it with whipped cream for a Thanksgiving dessert that’s foolproof and fast. (Yes, even on a Tuesday night.)
Instructions for caramelizing apples recipe: buttery spice-kissed crunch in one pan
Here's how to turn simple apples into a warm, spiced dessert with a perfect balance of crunch and caramelized sweetness.
Prepare the Apples for Even Cooking
Start by peeling and coring both the honeycrisp and granny smith apples. I like to use a sharp paring knife for the peeling and a small corer for the centers—this keeps the wedges clean and uniform. Cut each apple into 8 even wedges, about ½-inch thick. The granny smith apples will add a nice tart contrast to the sweet honeycrisp.
Place all the apple wedges in a large mixing bowl and drizzle with the 1 tablespoon freshly squeezed lemon juice. Toss gently to coat—this prevents the apples from browning while you prep the other ingredients. The lemon also brightens the flavor and helps balance the sweetness of the caramelized apples.
Create the Spiced Butter Mixture
In a separate bowl, combine the ½ cup cold cubed unsalted butter, ½ cup packed light brown sugar, 2 teaspoons ground cinnamon, and ½ teaspoon sea salt. Use your fingers or a fork to mix until the butter is evenly coated with the sugar and spices. I like to press the mixture between my fingers to create small, flavorful butter beads—this ensures every bite gets that perfect spiced butter flavor.
Add the 1 teaspoon vanilla extract to the mixture and stir until fully incorporated. The vanilla will deepen the warm, comforting aroma of the cinnamon and butter. Set this mixture aside while you prepare the apples—it'll have time to soften slightly as you work.
Caramelize the Apples in One Pan
Heat a large oven-safe skillet over medium heat. Add the prepared apple wedges in a single layer, making sure they don't overlap too much. Cook for 5-6 minutes, turning occasionally, until the apples begin to soften slightly and develop a golden color on the edges. You want them to start releasing their juices but not cook completely through yet.
Once the apples are lightly golden, reduce the heat to medium-low and carefully add the spiced butter mixture. Spread it evenly over the apples, using a spatula to coat them completely. The butter should begin to melt and bubble gently—this is when the magic happens. Let the mixture cook for 3-4 minutes, stirring occasionally, until the butter turns a rich golden brown color and the apples are tender when pierced with a fork.
Finish with Warmth and Crispy Edges
Transfer the skillet to a preheated 375°F oven and bake for 10-12 minutes. Watch closely during the last few minutes—you want the apples to caramelize further and develop crispy edges while remaining tender inside. The mixture should look glossy and bubbly, with a beautiful golden-brown color all around.
Once the apples are perfectly caramelized and bubbling, remove the skillet from the oven. Let the mixture sit for 2-3 minutes to thicken slightly—this helps the caramelized juices cling to the apples. Serve warm, either straight from the pan or transferred to a serving dish. The contrast between the tender apples and the crispy caramelized edges makes this dish irresistible.
Pro Tips For Making Caramelizing Apples
- Cut Apples Evenly: Use a mandoline or sharp knife to slice apples into ¼-inch rounds—thicker pieces stay undercooked, while thinner ones burn faster. I learned this the hard way after pulling out mushy centers from uneven slices.
- Sweat Apples First: Toss sliced apples with ½ tsp cinnamon and let them sit for 10 minutes before adding butter and sugar. This jumpstarts flavor infusion and prevents a bland, watery start—yes, even if you’re impatient like me.
- Skip the Overcrowding: Cook apples in single layers or in batches—packing the pan steams them instead of caramelizing. After burning three batches, I finally figured out: space matters more than speed.
- Brown the Sugar: Melt butter first, then add brown sugar and let it bubble for 2 minutes before tossing in apples. This deepens the caramel flavor—sounds weird, but it works. (Your future self will notice the difference.)
Essential equipment for this dish
Oven-Safe Skillet
An oven-safe skillet is your best friend for this recipe—it allows you to start cooking on the stovetop and finish in the oven for that perfect caramelized texture.
I recommend a 10-inch cast iron skillet like the Lodge Pre-Seasoned Cast Iron—it retains heat beautifully and develops a natural non-stick surface over time.
If you prefer lighter options, a stainless steel skillet (like All-Clad Stainless) works well too, but cast iron adds that extra depth of flavor. 🔥
High-Quality Butter
Don’t skimp on the butter—it’s what creates that rich, velvety caramelized coating. European-style cultured butter (like Plugrá or Kerrygold) has a higher fat content and deeper flavor, making it ideal for this recipe.
If you’re using standard unsalted butter, make sure it’s cold when you cube it—this helps it melt evenly without clumping. For extra richness, I sometimes mix in 1 tablespoon of ghee at the end for a nutty, caramelized finish.
Precision Tools
A sharp paring knife and a small apple corer (or melon baller) are essential for clean, even slices. I love the Mercer Culinary Genesis Paring Knife—it’s lightweight and glides through apple peels effortlessly.
For tossing the apples, a large mixing bowl (like OXO Good Grips) with high sides prevents spills. And don’t forget a spatula with a heat-resistant handle (I use Ozeri Touch-Grip) to stir the apples without burning your fingers.
Temperature Gauge
While this recipe doesn’t require a thermometer for the apples, an instant-read thermometer (like ThermoWorks Thermapen) is handy for checking the oven temperature—especially if your oven runs hot or cold.
For the stovetop, pay attention to the color of the butter: it should turn a deep golden brown (not burnt) before transferring to the oven. If you’re nervous about timing, use the fork test—the apples should be tender but still hold their shape when pierced. ✨
Optional Extras
Want to take your caramelized apples to the next level? A fine-mesh strainer helps drain excess juices if you prefer a thicker consistency, and a small saucepan is useful for making a quick honey-glaze (simmer 2 tbsp honey + 1 tbsp water for 2 minutes) to drizzle on top.
For nut lovers, a handheld torch (like Cuisinart Torch) adds a toasty crunch to pecans or walnuts sprinkled on top at the end.
Nutrition facts
Frequently asked questions
Can I use any type of apple for caramelizing?
The best apples for caramelizing are firm varieties like Honeycrisp (sweet) and Granny Smith (tart). They hold their shape well and develop great texture. Avoid mealy apples like Gala or Fuji—they turn mushy when cooked. For a budget option, Braeburn or Jonagold work well too. The key is balancing sweet and tart flavors for depth.
How do I prevent the apples from turning mushy?
Keep the heat medium-low after adding the butter mixture and avoid overcrowding the pan. Cook in batches if needed. The oven finish at 375°F helps create crisp edges while keeping centers tender. For extra firmness, add 1 teaspoon of cornstarch to the spiced butter mixture—it absorbs excess moisture beautifully.
Can I make this ahead of time?
Yes! Store caramelized apples in an airtight container for up to 3 days in the fridge. They reheat perfectly—just warm in a skillet for 2-3 minutes until bubbly. For longer storage, freeze portions for up to 2 months, but texture may soften slightly. The flavors actually deepen overnight, making them perfect for breakfast toppings or quick desserts.
What are the best ways to serve these caramelized apples?
Try them warm with vanilla ice cream or whipped cream for a classic dessert. For a savory twist, pair with pork chops or roasted chicken. They also work beautifully in oatmeal, pancakes, or as a topping for cheesecake. For extra flair, sprinkle with toasted pecans or drizzle with honey before serving.
Why did my caramelized apples turn out too sweet?
Too much sugar or using overly sweet apples (like Fuji) can make them cloying. Balance sweetness with tart apples like Granny Smith and reduce sugar to ¼ cup if needed. The lemon juice helps brighten flavors—don’t skip it! For extra depth, add a pinch of black pepper or cardamom to cut through sweetness while adding warmth.