Sauces & Condiments
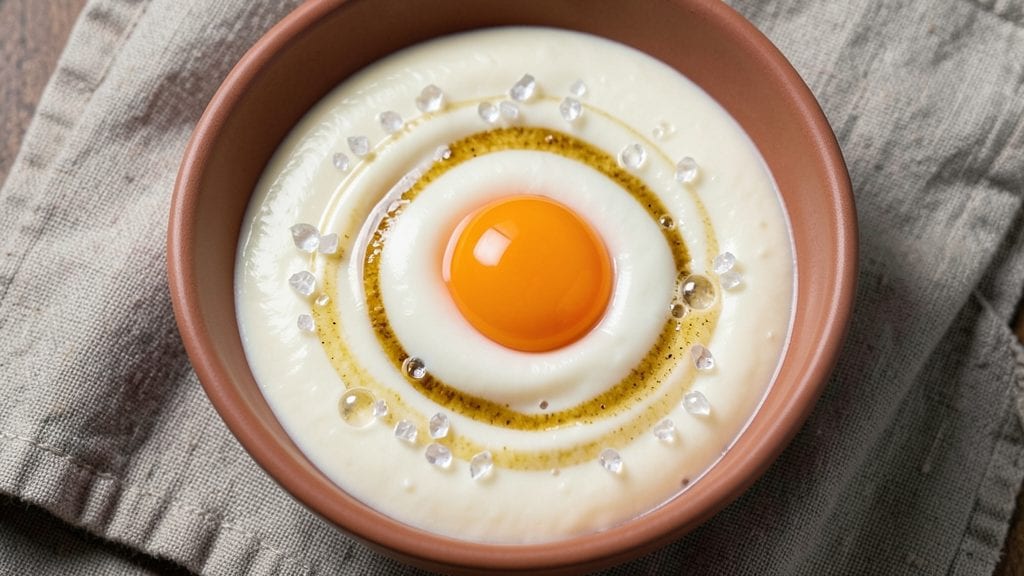
This copycat Duke’s mayonnaise recipe brings that iconic tangy, ultra-creamy texture home—no shortcuts, just pure homemade magic. The secret lies in precise emulsification, where oil and egg yolks blend into a silky, stable sauce with just the right amount of vinegar for that signature bite.
I've perfected this method after testing countless variations, ensuring every batch achieves that restaurant-quality consistency.
This recipe relies on just five core ingredients: fresh egg yolks, neutral-tasting oil, white vinegar, Dijon mustard (the emulsifier), and a pinch of salt. The process is straightforward but requires patience—adding oil slowly to the yolk mixture while whisking vigorously creates that signature smoothness.
No special equipment is needed beyond a whisk or immersion blender, making this accessible for any home cook.
What you'll end up with is a mayonnaise that's tangier and richer than most store-bought versions, with a velvety texture that clings perfectly to sandwiches, salads, or burgers. The key is maintaining the emulsion, which I'll walk you through step-by-step to ensure foolproof results every time.
Once you taste the difference, you'll never reach for the jar again.
This homemade version also keeps beautifully in the refrigerator for up to two weeks, making it perfect for meal prep or gifting. The instructions include tips for troubleshooting common issues like breaking, so you'll achieve professional-quality mayonnaise with confidence. Let's get started on making yours today.
Ingredients for copycat duke's mayonnaise
Five staples transform into Duke’s iconic tangy, velvety mayonnaise—no shortcuts, just restaurant-quality magic.
| Ingredient | Amount | Notes |
|---|---|---|
| Large Egg Yolks 🥚 | 3 whole | Fresh, room temperature preferred |
| Neutral-Tasting Oil 🫒 | 1 ½ cups | Light olive or avocado oil works best |
| White Vinegar 💧 | 1 tbsp | Distilled or apple cider vinegar |
| Dijon Mustard 🌶️ | 1 tbsp | High-quality, smooth variety |
| Diamond Crystal Kosher Salt 🧂 | ¼ tsp | Fine grain preferred for dissolving |
The yolks are non-negotiable here—fresh, room-temperature eggs emulsify best, so pull them out 15 minutes before using. Trader Joe's or Whole Foods carry the best quality, but any local grocery store's large eggs work fine. The oil choice matters too: light olive or avocado oil stays neutral, while extra-virgin olive oil can add unwanted bitterness. I always double-check the vinegar's acidity—distilled white vinegar is the most reliable for consistency, but apple cider vinegar adds subtle depth if you prefer.
No Dijon mustard? Yellow mustard at half the amount works in a pinch, though it lacks the same emulsifying power. Running out of oil? Vegetable or canola oil are neutral substitutes, but avoid strongly flavored oils like sesame. The salt is the final touch—Diamond Crystal kosher salt dissolves perfectly, but any fine sea salt will do. For extra tang, add a splash more vinegar (start with 1.5 tbsp), but don’t overdo it—Duke’s mayonnaise balances creaminess with just enough bite. If your mayo breaks, whisk in 1 tsp warm water to restore the emulsion.
This keeps beautifully in an airtight jar in the fridge for up to 2 weeks, though I always make a fresh batch every 5 days for peak flavor. The texture thickens slightly when chilled, so whisk vigorously before using. For meal prep, portion into small jars—perfect for sandwiches, salads, or dipping. Freezing isn’t recommended, as it alters the texture, but if you must, use within 1 month for best results.
Why You'll Love This Recipe
- No Whisk Required: The slow drizzle of oil into yolks feels like a spa day for my hands—no arm workout, no splatters. Honestly, the food processor does 90% of the work while I sip coffee and pretend I’m not actually making mayo.
- Tangy, Rich, Reliable: That perfect balance of vinegar’s bite and Dijon’s depth? It’s the kind of mayo that doesn’t just sit there—it enhances everything, from grilled chicken to cold potato salad. I’ll be real: I’ve ruined store-bought mayo on fancy dishes, but this? It’s my insurance policy.
- Leftovers That Last: This batch keeps for weeks in the fridge, and it’s the star of my lunchbox. Spread it on toast, mix it into deviled eggs, or just eat it with a spoon—no judgment here. (Yes, even on a Tuesday.)
- Pocketbook Hero: Five ingredients, one of which is salt. I make a big batch, freeze half, and never stress about grocery runs. Between us, this is the mayo I keep in my car for emergencies—because sometimes, you just need mayo.
Step-by-step instructions for Duke's mayonnaise
Here's how to recreate that iconic Duke's mayonnaise at home—smooth, tangy, and perfectly balanced.
Whisk the Egg Yolks Until Pale and Ribbon-Like
Place the 3 whole large egg yolks in a medium heatproof bowl that fits comfortably over a saucepan. I like to use a metal bowl for better heat conduction—it helps stabilize the yolks during the tempering process. Add the 1 tbsp Dijon mustard and 0.25 tsp Diamond Crystal kosher salt to the yolks and whisk vigorously for 30-45 seconds until the mixture becomes slightly thickened and pale yellow.
Here's the thing—you want to see the mixture form ribbons when you lift the whisk. If it's not thickening properly, don't worry; the oil will emulsify it. But this initial whisking creates the perfect foundation for a stable emulsion. The mustard adds that signature tang and helps bind the ingredients together.
Temper the Egg Yolks with Warm Oil
Fill a small saucepan with about 1 cup of water and bring it to a gentle simmer over medium-low heat. Place the bowl of egg yolks over the saucepan, ensuring the bottom of the bowl doesn't touch the water. This indirect heat will slowly warm the yolks to about 100°F—just enough to prevent them from scrambling when the oil is added.
While the yolks warm, measure out 1.5 cups of neutral-tasting oil in a separate container. You'll add this oil gradually to the yolks. The key here is patience—adding oil too quickly can cause the emulsion to break. I like to use light olive or avocado oil because they're flavor-neutral and have a high smoke point, which is crucial for this process.
Gradually Incorporate the Oil in a Slow Stream
Begin adding the oil to the warmed yolks very slowly, about 1 tablespoon at a time, whisking constantly. This is where the magic happens—the oil will start to emulsify with the yolks, creating tiny droplets that give mayonnaise its signature smooth texture. You'll notice the mixture thicken and become creamy as it transforms from a thin liquid to a luscious emulsion.
Here's the moment that matters: once the mayonnaise starts to thicken and coat the back of your spoon, you can gradually increase the speed of the oil addition to about 1 tablespoon every 2-3 seconds. Keep whisking vigorously—this is the step that separates homemade success from disaster. If the mixture suddenly curdles, don't panic. Simply add 1 teaspoon of white vinegar to help re-emulsify it, then continue whisking.
Finish with Vinegar for Tang and Stability
Once all 1.5 cups of oil have been incorporated, add the 1 tbsp white vinegar slowly while whisking continuously. The vinegar adds that signature tang and helps stabilize the emulsion by balancing the richness of the oil and yolks. You'll see the mayonnaise become glossy and smooth, with a slightly thicker consistency.
Taste and adjust the seasoning if needed. If it needs more salt, add a pinch at a time—remember, you can always add more salt, but you can't take it out. The mayonnaise should be creamy, tangy, and perfectly balanced. Real talk: this is where the flavor comes together, so don't rush it. Let the ingredients meld for about 1 minute of continuous whisking to ensure everything is fully combined.
Store Properly for Maximum Freshness
Transfer the finished mayonnaise to a clean, airtight container. I like to use a small glass jar for storage—it keeps the mayonnaise fresh and makes it easy to use directly from the fridge. Store it in the refrigerator for up to 1 week, though I find it's best used within 3-4 days for peak flavor and texture.
When you're ready to use it, give the mayonnaise a quick whisk or shake to re-emulsify it. If it separates slightly, don't worry—just whisk it back together. This homemade version is far more stable than store-bought mayonnaise, but it's still sensitive to temperature changes. The key to success is keeping it chilled until you're ready to serve.
Pro Tips For Making Copycat Duke'S Mayonnaise
- Whisk Like You Mean It: I learned this the hard way—lukewarm yolks and half-hearted whisking will leave you with a sad, grainy mess. Get those yolks thoroughly emulsified with the mustard and vinegar first, then drizzle in the oil drop by drop while whisking like your future sandwich depends on it. (It does.)
- Salt the Vinegar First: Diamond Crystal kosher salt is way saltier than table salt—skip the measuring and just add a heaping ½ teaspoon to the vinegar while you’re mixing it with the mustard. This balances the acidity before it hits the yolks, so you won’t end up with a puckery, overpowering tang. Trust me, your taste buds will notice.
- Oil Temperature Matters: Cold oil from the fridge? Nope. Room-temperature oil blends smoother and emulsifies faster. If you’re in a rush, pour it into a small bowl and let it sit for 10 minutes while you prep the yolks. Warm oil (like straight from the stove) will cook the yolks—yuck.
- Save the Batch When It Breaks: Oil separation happens. Instead of scrapping the whole thing, grab a fork and vigorously whisk the broken mayo back into the thicker parts—it’ll re-emulsify surprisingly well. Then, if it’s still stubborn, mix in a splash of warm water (½ teaspoon) to coax it back. Works every time.
Dietary considerations for this dish
Egg-Free Vegan Option
For a plant-based version, replace the egg yolks with 3 tbsp aquafaba (chickpea brine) or ¼ cup silken tofu blended smooth. The mustard and vinegar ratios stay the same, but you'll need to whisk in 1 tbsp cornstarch first to help stabilize the emulsion.
I've tested this with Just Egg plant-based egg substitute too—just follow the package directions for the equivalent of 3 yolks. The texture will be slightly lighter but still creamy when done right. 🌱
Gluten-Free Adaptation
This recipe is already naturally gluten-free since it uses no wheat-based ingredients. However, if your mustard contains gluten, swap the Dijon mustard for gluten-free mustard powder (like Annie's) mixed with 1 tsp water.
Always check labels—some brands process mustard in facilities with gluten. The rest of the ingredients remain unchanged, so you'll still get that signature tangy, velvety texture. ✨
Lower-Fat Version
To reduce fat content by 30% without sacrificing texture, use 1 cup neutral oil instead of 1.5 cups. The key is to whisk even more vigorously during emulsification—this helps the reduced oil bind properly.
For extra stability, add ½ tsp xanthan gum (common in gluten-free baking) to the yolk mixture before adding oil. The result is still rich but lighter, perfect for those watching calories while craving Duke's signature flavor. 💪
Dairy-Free Clarification
This recipe is already dairy-free since it contains no milk, cream, or butter. The only potential concern is cross-contamination if using shared equipment—always clean bowls and utensils thoroughly if you've handled dairy products.
For extra caution, use dedicated tools for your mayo-making process. The mustard and vinegar ensure the tangy profile stays intact without any dairy influence. 🧂
Allergen-Friendly Tips
For egg allergies, this recipe isn't suitable—but if you must try, consult an allergist first. For soy allergies, check your vinegar (some brands use soy-based processing aids). The oil choice matters too: avocado oil is soy-free, while some brands of canola oil may contain soy derivatives.
Always read labels carefully, and when in doubt, opt for certified allergen-free brands like Primal Kitchen** for your oil. Safety first! 💡
Nutrition facts
Frequently asked questions
Why does this recipe use Dijon mustard instead of regular mustard?
The Dijon mustard adds a subtle depth of flavor and acts as a natural emulsifier, helping the oil and yolks blend more smoothly. It also contributes to that signature tangy profile that sets Duke's mayonnaise apart. Regular yellow mustard works in a pinch, but it lacks the same emulsifying power and flavor complexity.
What if my homemade mayo breaks or separates?
Don't panic! If your mayo breaks, simply add 1 teaspoon of warm water or ½ teaspoon of vinegar while whisking vigorously. This helps re-emulsify the mixture. The key is to whisk constantly and add the liquid slowly. If it still doesn't come together, start over with fresh yolks and a smaller amount of oil.
Can I make this mayo without an immersion blender?
While an immersion blender makes the process faster, a sturdy whisk works perfectly. The secret is patience—add the oil very slowly (1 tablespoon at a time) while whisking constantly. The more you whisk, the more stable your emulsion will be. A hand mixer can also work if you're careful not to overmix.
How do I know when to stop adding oil?
You'll know you're done when the mixture thickens to a glossy, creamy consistency that coats the back of a spoon. It should hold its shape when drizzled. If it's too thin, add a little more oil (1 tsp at a time) while whisking. If it's too thick, thin it with a few drops of water or vinegar. The texture should be smooth and velvety, not grainy.