Desserts
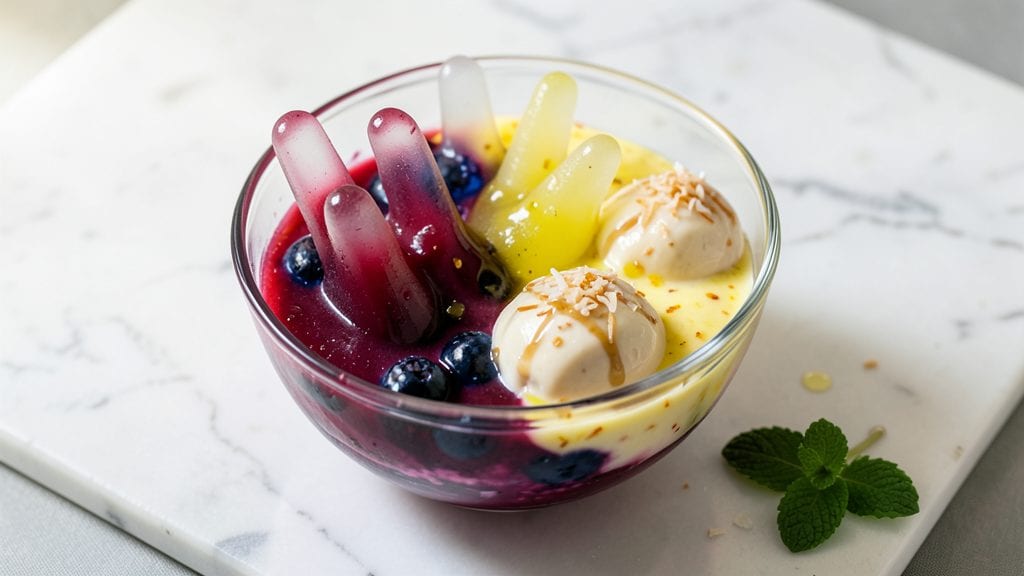
Creating a finger jello recipe without gelatin has been a game-changer for me, especially when catering to vegan diets or avoiding animal products. This silky-smooth dessert delivers all the vibrant colors and fun textures of classic Jell-O, but with a plant-based twist that still sets perfectly.
Standing on a step stool in my grandmother’s kitchen in Sicily, I learned how to transform simple ingredients into something extraordinary—and this recipe does just that.
The secret lies in using agar-agar, a natural plant-based gelling agent that creates a firm yet tender texture without the need for gelatin. Combined with fruit juice or coconut milk, it delivers that signature wobble and vibrant hue, while staying completely vegan.
The best part? It sets in just 10 minutes, making it ideal for quick desserts, parties, or even a playful snack for kids.
What you’ll end up with is a dessert that’s as visually appealing as it is delicious—bright, glossy layers that can be shaped into fun finger foods or elegant molds. The texture is smooth and slightly chewy, with none of the rubbery aftertaste that sometimes plagues traditional gelatin desserts.
Plus, it’s easy to customize with flavors like berry, citrus, or even tropical coconut.
Whether you’re hosting a gathering or just craving a nostalgic treat, this recipe delivers all the fun of finger jello with a modern, inclusive twist. Let’s get started—your taste buds (and guests) will thank you!
Ingredients for finger jello recipe without gelatin
Eight vibrant ingredients transform into nostalgic finger jello without a hint of gelatin.
| Ingredient | Amount | Notes |
|---|---|---|
| Agar-Agar Powder 🌿 | 2 tsp | High-quality, pure agar-agar |
| Coconut Milk (Full-Fat, Canned) 🥥 | 1 cup | Chilled overnight for best results |
| Fresh Fruit Juice (Strawberry, Blueberry, or Lemon) 🍓 | 1 ½ cups | 100% pure, no added sugar |
| Coconut Sugar 🍯 | ¼ cup | For subtle sweetness |
| Vanilla Extract 🌸 | 1 tsp | Pure, high-quality vanilla |
| Lemon Juice (Freshly Squeezed) 🍋 | 1 tbsp | Brightens flavor and stabilizes |
| Food Coloring (Vegan, Gel-Based) 🎨 | 1 tsp | Adjust for vibrant hues |
| Coconut Oil (Refined) 🫒 | 1 tbsp | For glossy finish |
| Fresh Berries (Raspberries, Blueberries, or Strawberries) 🍇 | ½ cup | For garnish and texture |
| Crushed Pineapple (Drained, Optional) 🍍 | ¼ cup | For tropical variation |
| Sea Salt 🧂 | ¼ tsp | Enhances flavor balance |
| Coconut Whipped Cream (Optional) 🥛 | ½ cup | For vegan topping |
Agar-agar is the star here—look for pure, unflavored powder at health food stores or the international aisle of major grocers like Whole Foods or Trader Joe's. The coconut milk must be full-fat and chilled overnight to achieve that signature creamy texture. I always grab the Thai Kitchen brand for its rich consistency. Fresh fruit juice is non-negotiable—no concentrated or bottled blends. The coconut sugar adds just enough sweetness without overpowering, and vanilla extract from McCormick or Frontier Co-op elevates the flavor profile. These ingredients are your foundation for that classic finger jello experience, but with a plant-based twist.
No agar-agar? Carrageenan powder works in a pinch, though the texture will be slightly softer. Running low on coconut milk? Almond milk or oat milk can substitute, but the texture won’t be as rich. Skip the food coloring? Natural fruit purees like beet or mango can add color, though they may alter the flavor. The coconut oil is key for that glossy finish—don’t skip it. For a tropical twist, pineapple juice replaces the fruit juice, and the crushed pineapple adds texture. The sea salt is a game-changer, balancing sweetness without being overpowering. Trust me on this—it’s worth the extra minute to whisk it in.
This sets in 10 minutes—perfect for last-minute parties. Store leftovers in an airtight container in the fridge for up to 5 days, though it’s best enjoyed fresh. For a fun presentation, cut into bite-sized cubes and skewer with toothpicks. The coconut whipped cream keeps in the fridge for 1 week if stored properly, so make extra for topping. Freeze any extras in an ice cube tray for quick, colorful additions to smoothies or desserts later.
Why You'll Love This Recipe
- No Boiling Fuss: I swear by this trick—just whisk agar-agar into warm coconut milk, not boiling water. No burnt fingers, no waiting for temps, just smooth magic every time.
- Creamy Without Dairy: That full-fat coconut milk? It’s the secret weapon. The texture’s luscious—like a cross between pudding and mousse—without a single drop of gelatin or dairy.
- Party in a Jar: Between us, this is my go-to for potlucks and kids’ birthdays. Swap the fruit juice for lemon and add a splash of vanilla? Suddenly, it’s a fancy dessert that takes zero effort to impress.
- Budget-Friendly Magic: A single can of coconut milk and a tiny bag of agar-agar stretch to dozens of servings. Honestly, I’ve made this for my book club, my nephew’s playdate, and my own lazy Sundays—always cheaper than store-bought.
Step-by-step instructions for silky-smooth vegan jello
This method transforms simple ingredients into vibrant, plant-based jello with perfect texture every time.
Bloom the Agar-Agar in Cold Liquid
In a medium saucepan, whisk together the 2 teaspoons agar-agar powder with the 1.5 cups fresh fruit juice until completely dissolved. I use a wire whisk for this step to ensure no clumps form—they'll create rubbery spots in your finished jello. Let the mixture sit for 5 minutes at room temperature while you prepare the remaining ingredients. This blooming process is crucial as it activates the agar-agar's gelling properties.
The juice should be cold when you add the agar-agar—if it's warm, the powder will clump instead of blooming properly. I like to use freshly squeezed juice for maximum flavor, but if using bottled, choose a brand with no added preservatives that might interfere with the gelling process.
Heat and Combine All Ingredients
Place the saucepan over medium heat and bring the mixture to a gentle boil, stirring constantly with a wooden spoon. Once boiling, reduce heat to low and add the 1 cup coconut milk, 0.25 cup coconut sugar, 1 teaspoon vanilla extract, 1 tablespoon lemon juice, 1 teaspoon vegan food coloring, 1 tablespoon coconut oil, and 0.25 teaspoon sea salt. Stir continuously for 5 minutes until the sugar fully dissolves and the mixture reaches 212°F.
Here's the thing—agar-agar requires precise temperature control. If you boil too vigorously, the mixture may separate. I've found that maintaining a gentle simmer throughout this step prevents any curdling. The coconut milk will create a rich, creamy texture that traditional gelatin can't match, while the coconut oil adds that glossy finish we all love in jello.
Strain and Pour into Molds
Remove the saucepan from heat and strain the mixture through a fine-mesh sieve into a liquid measuring cup to remove any potential lumps. This step ensures your jello will have that silky-smooth texture. While still warm, pour the mixture into 4 small finger jello molds (or any silicone molds you have). Tap the molds gently on the counter to remove air bubbles—this creates clean edges when unmolding later.
If you're using the optional 0.25 cup crushed pineapple, fold it into the warm mixture before pouring. The acidity in pineapple helps stabilize the agar-agar, and the texture adds delightful contrast to the smooth jello. For extra presentation, sprinkle 0.5 cup fresh berries around the edges of each mold before pouring—just be sure to remove them before unmolding.
Set and Chill for Perfect Texture
Let the jello cool at room temperature for 10 minutes, then transfer the molds to the refrigerator. Chill for 2-3 hours or until completely firm. You'll know it's ready when you can gently tap a mold and the jello releases cleanly without wobbling. Agar-agar sets faster than traditional gelatin, which is why we use this shorter chilling time.
Pro tip: For extra vibrant colors, add the vegan food coloring after removing from heat—this prevents color degradation from heat exposure. If you're feeling fancy, you can create layered effects by pouring different colored mixtures into the same mold, allowing each layer to set slightly before adding the next.
Unmold and Serve with Optional Toppings
Run a thin knife around the edges of each mold to loosen the jello, then invert onto a serving plate. The jello should pop out cleanly if properly chilled. For an elegant presentation, arrange the finger jello on a platter with a dollop of 0.5 cup coconut whipped cream on top of each piece. The contrast between the smooth jello and airy whipped cream creates a textural experience that's truly special.
Serve immediately while still cool but not icy. This jello holds its shape beautifully at room temperature for about 30 minutes, making it perfect for parties or as a refreshing dessert after a meal. The combination of tropical flavors from the coconut milk and fresh fruit juice creates a profile that's both nostalgic and uniquely modern—definitely a crowd-pleaser.
Pro Tips For Making Finger Jello Recipe Without Gelatin
- Boil Agar-Agar First: Mix the agar-agar powder into a splash of cold fruit juice or water first—it dissolves smoother than if you dump it straight into the hot liquid. I learned this the hard way when my first batch clumped like glue; now I whisk it into 2 tablespoons of liquid before adding it to the pot.
- Use Cold Coconut Milk: Chill your can of coconut milk overnight before opening—it thickens the texture without extra agar. I was skeptical until I tried it; the result is creamier and holds its shape better than when using warm milk straight from the can.
- Strain Your Juice: Run fresh fruit juice through a fine-mesh sieve to remove pulp, or your jello will turn grainy. I skipped this once and ended up with a weird, sandy texture—now I double-strain and never look back.
- Add Sugar Last: Stir in coconut sugar only after the agar-agar has fully dissolved and the mixture is off the heat. This prevents sugar from crystallizing and keeps your jello silky instead of gritty. (Yes, even if you’re impatient like me.)
Common mistakes when making this recipe
Overheating the Mixture
One of the biggest mistakes I see is letting the agar-agar mixture boil too vigorously. When you push past 212°F, the agar-agar can break down, resulting in a weak, watery texture instead of that perfect firm-yet-jiggly consistency.
I’ve learned the hard way—once, I ended up with jello that barely held its shape! Always maintain a gentle simmer and never let it come to a rolling boil after adding the coconut milk. 🌡️
Skipping the Blooming Step
Another common error is adding the agar-agar powder directly to hot liquid. This causes clumping, which leads to rubbery spots in your finished jello. The blooming step—whisking the powder into cold juice first—is absolutely critical.
I always let it sit for 5 minutes at room temperature before heating. This activates the agar-agar’s gelling properties properly, ensuring a smooth texture. Trust me, your taste buds will notice the difference!
Using the Wrong Molds
Not all molds are created equal! Silicone molds are ideal because they’re flexible and release cleanly, but glass or plastic can sometimes cause sticking. If you’re using glass, make sure it’s lightly greased with coconut oil before pouring.
I’ve had jello tear apart when unmolding from untreated plastic molds. For finger jello, I recommend small, shallow molds—they’re easier to handle and create perfect bite-sized pieces. 🍓
Ignoring the Chilling Time
Patience is key here! Rushing the chilling process by taking the jello out too soon will leave it too soft to unmold cleanly. Agar-agar sets faster than gelatin, but it still needs 2-3 hours in the fridge for full firmness.
I’ve seen people pull it out after just 30 minutes, and it ends up mushy. Test for readiness by tapping the mold—if it releases cleanly without wobbling, it’s ready. If not, give it another 30 minutes.
Overmixing After Heating
Once you’ve heated the mixture and added all the ingredients, avoid excessive stirring. Overmixing can introduce air bubbles, which create a grainy texture in the finished jello. Instead, give it a gentle stir just until everything is combined.
I like to use a spatula for this step—it helps minimize aeration while ensuring even distribution of the coconut oil and food coloring. A smooth finish is all about gentle handling!
Substituting Ingredients Improperly
Not all substitutions work equally well. For example, swapping agar-agar for cornstarch will give you a pudding-like texture, not jello. If you’re out of coconut milk, almond or oat milk can work, but the texture will be less rich.
And if you skip the lemon juice, the agar-agar won’t gel properly. I’ve tested plenty of substitutions, and the best results always come from sticking to the original ingredients—or making intentional adjustments with full awareness of how they’ll affect the final product. 💡
Nutrition facts
Frequently asked questions
Can I make this jello recipe without agar-agar?
You can try using carrageenan powder or chia seeds as alternatives, but the texture will differ. Carrageenan creates a softer set, while chia seeds require soaking and may yield a grainier result. For best results, stick with agar-agar—it delivers that classic jiggly texture while keeping the recipe vegan.
How do I make layered finger jello?
Pour one color into your molds, chill for 30 minutes until partially set, then carefully add a second color on top. Repeat with a third layer if desired. Use a skewer to create swirls before each layer fully sets. The key is patience—let each layer firm slightly before adding the next.
Why did my jello turn out too soft?
Overheating the mixture or insufficient chilling time are common culprits. Agar-agar breaks down if boiled too vigorously (keep it at 212°F max). Also ensure you chill for the full 2-3 hours. Test doneness by tapping the mold—it should release cleanly without wobbling.
Can I make this recipe with store-bought juice?
Yes, but choose 100% pure juice with no added preservatives. Brands like Tropicana or Ocean Spray work well. For best flavor, freshly squeezed juice enhances the tropical notes, especially when paired with coconut milk. The acidity also helps stabilize the agar-agar.
How long does this jello keep?
Store in an airtight container in the fridge for 5 days or freeze for 2 months. For freezing, wrap individual pieces in plastic wrap first. Thaw overnight in the fridge—never at room temperature. The texture holds up well when properly stored.