Desserts
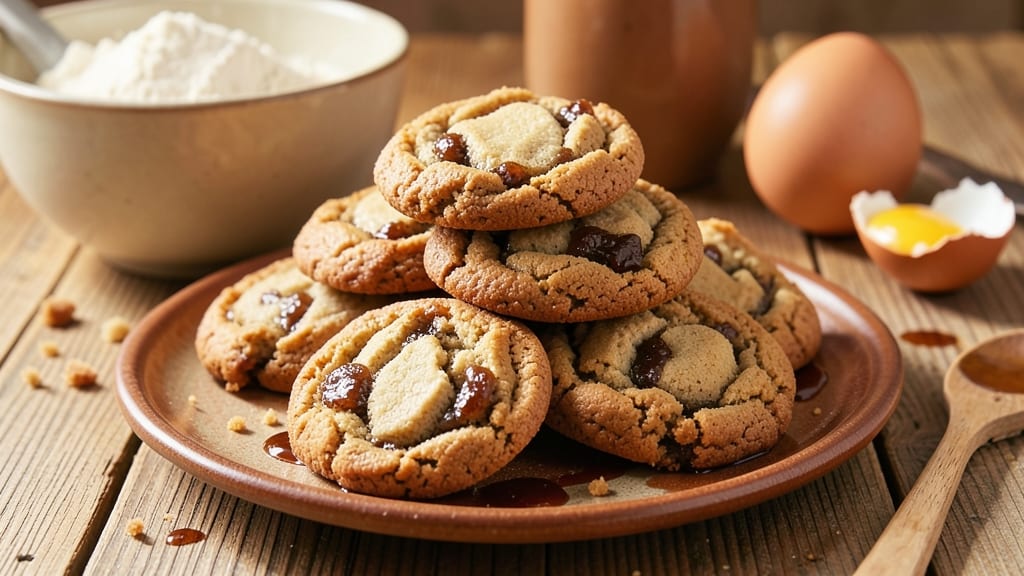
Grandma's molasses cookies bring back the warm, spiced aroma of childhood kitchens—thick, chewy centers with edges that caramelize into perfect sweetness. This recipe preserves the old-school charm while making it foolproof for modern bakers, with just the right balance of molasses depth and cinnamon warmth. I still remember the way my grandma would press these into the oven, filling the house with that unmistakable molasses scent.
The secret lies in the molasses itself—use unsulphured for that authentic, rich flavor—and letting the dough rest for 30 minutes before baking. This ensures tender, moist cookies that hold their shape without spreading too much.
The spices (cinnamon, ginger, and cloves) create a cozy, nostalgic taste that pairs beautifully with a simple vanilla glaze or dusting of powdered sugar.
By the time they cool on the baking sheet, you’ll have cookies with caramelized edges that crack slightly when bitten, revealing a soft, spiced center. These aren’t just cookies—they’re a piece of family history, easy enough to bake for holidays or weeknight treats.
The dough keeps well for 5 days in the fridge, so you can make a batch ahead and enjoy them whenever the craving hits.
Serve warm with a cup of coffee or milk for the full experience—just like Grandma used to. The recipe scales perfectly for gifts or gatherings, and the chewy texture makes them irresistible. Let’s get baking!
Ingredients for grandma's molasses cookie
Twelve simple ingredients transform into Grandma's legendary molasses cookies—spiced, chewy, and caramelized to perfection.
| Ingredient | Amount | Notes |
|---|---|---|
| Unsulphured Molasses 🍯 | 1 cup | Dark, rich, and unsulphured for authentic flavor |
| All-Purpose Flour 🌾 | 3 ½ cups | Sifted for light texture, spooned into measuring cup |
| Unsalted Butter 🧈 | 1 cup | Cold, cubed for easier mixing (not melted) |
| Granulated Sugar 🍚 | 1 ¼ cups | Lightly packed for accurate measurement |
| Brown Sugar 🍚 | ½ cup | Packed firmly for moisture |
| Large Eggs 🥚 | 2 whole | Room temperature for even mixing |
| Ground Cinnamon 🌿 | 2 tsp | Freshly ground for maximum aroma |
| Ground Ginger 🌿 | 1 ½ tsp | Freshly ground for zesty kick |
| Ground Cloves 🌶️ | ½ tsp | Freshly ground for authentic warmth |
| Diamond Crystal Kosher Salt 🧂 | 1 tsp | Fine grain for even distribution |
| Pure Vanilla Extract 🍯 | 1 tsp | High-quality, alcohol-based preferred |
| Baking Soda 🧪 | 1 tsp | Freshly opened for potency |
The molasses is non-negotiable—unsulphured is key for that deep, rich flavor Grandma swore by. Goya or Cumberland brands are my go-tos, but any high-quality unsulphured works. If you can't find it, sulphured molasses will still work, but the flavor won't be quite as authentic. The spices are where the magic happens: freshly ground cinnamon, ginger, and cloves give that cozy, nostalgic taste. I buy mine at Penzeys or the bulk section at Whole Foods—they stay potent for months if stored properly. For the flour, King Arthur or Gold Medal are reliable, but any all-purpose will do. Just don't skip sifting—it makes all the difference in texture.
No molasses? Blackstrap syrup is the closest substitute, though it's even more intense. Short on butter? Coconut oil works in a pinch (use the same amount), but trust me on the full-fat, unsalted version—it keeps the cookies tender. The sugars can be swapped for turbinado or coconut sugar, though granulated and brown are ideal. For the vanilla, alcohol-based extract is best (like McCormick or Nike brands), but imitation will work if that's all you've got. The baking soda is critical—don't confuse it with baking powder. If you're worried about overmixing, chill the dough for 30 minutes before scooping. And yes, you can freeze the dough balls for up to 3 months—just bake straight from frozen, adding 2-3 minutes.
These cookies reheat beautifully—just 5 minutes at 350°F makes them soft again. Store them in an airtight container with parchment between layers to keep them from getting soggy. They'll stay fresh for 5 days at room temperature, though they're usually gone in 24 hours. For gifts, wrap individually in wax paper and tie with twine—Grandma's trick. The dough keeps for 5 days in the fridge, so you can prep ahead. And if you make a double batch? Freeze half—they taste just as good thawed and baked.
Why You'll Love This Recipe
- No-Fuss Mixing: I swear by this—just cream the butter and sugars, toss in the molasses, then fold in the dry stuff. No egg whites to whip, no rolling required. The dough comes together faster than I can sing "Happy Birthday" twice.
- Molasses Magic: That deep, sticky sweetness from unsulphured molasses? It’s the star. The cookies caramelize just enough to stay soft inside while the edges get that perfect chewy crunch—like a hug in cookie form.
- Holiday or Snack Attack: These work for everything. Bake a tray for Christmas gifts, freeze the dough for last-minute treats, or just grab one straight from the jar when you need a pick-me-up. (Yes, even on a Tuesday night.)
- Budget-Friendly Staples: Flour, sugar, butter—stuff you already have. Molasses lasts forever, and a single batch stretches to feed a crowd or last me all week. Cheap, reliable, and no fancy ingredients needed.
Step-by-step instructions for Grandma's molasses cookies
Here's how to craft these legendary cookies with their signature caramelized edges and spiced chew.
Cream the Butter and Sugars Together
In a stand mixer fitted with the paddle attachment, combine the 1 cup unsalted butter (cold and cubed) with the 1.25 cups granulated sugar and 0.5 cup brown sugar. Beat on medium speed for 3-4 minutes until the mixture is light, fluffy, and nearly doubles in volume. You'll notice the butter pieces emulsify into the sugars, creating a pale, airy consistency that's crucial for that tender cookie texture.
Here's the thing—don't rush this step. The butter needs to fully incorporate with the sugars to create the right texture. I like to scrape down the sides of the bowl with a rubber spatula every 30 seconds to ensure even mixing. The mixture should be smooth with no visible butter chunks remaining.
Add Molasses and Eggs for Depth of Flavor
Reduce the mixer speed to low and gradually add the 1 cup unsulphured molasses while scraping the bowl. The molasses will initially make the mixture look curdled, but keep mixing—it will come together. Add the 2 whole large eggs one at a time, mixing just until each is fully incorporated after about 15 seconds per egg.
Next, stir in the 1 tsp pure vanilla extract. This is where the magic happens—the molasses provides that deep, rich flavor while the vanilla adds brightness. The mixture should now be smooth and thick, almost like a soft dough. If it seems too stiff, don't worry—it will come together as we add the dry ingredients.
Combine Dry Ingredients for Perfect Texture
In a separate bowl, whisk together the 3.5 cups all-purpose flour, 2 tsp ground cinnamon, 1.5 tsp ground ginger, 0.5 tsp ground cloves, 1 tsp baking soda, and 1 tsp diamond crystal kosher salt. Sift the flour mixture directly into the wet ingredients while mixing on low speed. This prevents gluten development and ensures a tender cookie.
Once combined, use a rubber spatula to fold in any remaining dry ingredients from the bowl. The dough will be thick and sticky—this is normal. If it seems too stiff, you can add 1-2 tablespoons of milk (though our ingredients list doesn't include it, the molasses provides enough moisture). The dough should hold together when pressed but still be workable.
Chill the Dough for Better Shape and Flavor
Divide the dough into two equal portions and flatten each into a 1-inch thick disk. Wrap tightly in plastic wrap and refrigerate for at least 2 hours (or up to 48 hours for even better flavor development). Chilling firms up the dough, which prevents excessive spreading in the oven and allows the spices to meld more deeply.
This step is non-negotiable for the best results. The longer you chill, the more pronounced the molasses flavor becomes. If you're short on time, you can freeze the dough disks for up to 3 months—just thaw in the refrigerator before baking.
Bake to Caramelized Perfection
Preheat your oven to 350°F and line two baking sheets with parchment paper. Using a 2-tablespoon cookie scoop, portion the chilled dough onto the prepared sheets, spacing them 2 inches apart. Gently flatten each cookie to about ¼-inch thickness—this ensures even baking and that signature crackly top.
Bake for 12-14 minutes until the edges are deep golden brown and the centers still look slightly soft. The cookies will continue cooking on the hot sheet after removal. Let them cool on the baking sheet for 5 minutes before transferring to a wire rack to cool completely. The centers should be soft and chewy with a crisp exterior—this is what makes these cookies so special.
Store Properly for Maximum Freshness
Once completely cooled, store the cookies in an airtight container at room temperature for up to 5 days. For longer storage, freeze the baked cookies in a single layer before transferring to a container—this preserves their texture. When ready to eat, simply warm in the oven at 300°F for 3-5 minutes to restore that fresh-baked flavor.
These cookies improve with age as the flavors deepen, so they're perfect for making ahead. The molasses and spices create a complex flavor profile that gets even better over time. Enjoy them with a glass of milk or a cup of tea for the full experience.
Pro Tips For Making Grandma'S Molasses Cookie
- CHILL THE DOUGH: I learned this the hard way—rolling out warm molasses cookie dough makes it stick to everything. Pop it in the fridge for at least 30 minutes (or up to 24 hours if you're prepping ahead). The flour absorbs moisture better when cold, and your cookies won’t flatten into sad pancakes on the sheet.
- WEIGH THE MOLASSES: Molasses is thicker than syrup, and measuring cups lie. Use a kitchen scale for 1:1 weight-to-volume if the recipe calls for cups—1 cup unsulphured molasses weighs about 12.5 oz. Trust me, your cookies will be consistently chewy and rich, not dry or gooey.
- SALT THE BUTTER: Skip the extra pinch of salt in the dough if your butter’s unsalted. Cream it with the sugars until it’s light and fluffy—this incorporates air, which makes the cookies spread less. (Yes, even if you’re impatient like me.)
- BAKE IN WAVES: Molasses cookies need space to rise, not crowd like sardines. Arrange dough balls 2 inches apart on the sheet—yes, it’ll look half-empty. Rotate the pan halfway through baking for even color, and resist the urge to peek. The first batch will teach you the perfect time.
Essential equipment for this recipe
Stand Mixer Essentials
Your stand mixer is the workhorse of this recipe—I swear by my KitchenAid Artisan Series for its power and durability. The paddle attachment is critical for creaming the butter and sugars to that perfect fluffy texture.
If you don’t have a mixer, use a hand mixer or wooden spoon with elbow grease, but be prepared for more effort. The bowl scraper I use is a game-changer for getting every last bit of dough off the sides during mixing. 💡
Precision Measuring Tools
Accurate measurements are non-negotiable for these cookies. Invest in a digital kitchen scale for flour and sugars—OXO Good Grips is my top pick—it ensures consistency every time. For the molasses, a liquid measuring cup with a spout makes pouring easier, and always use unsulphured molasses for that authentic depth.
A 2-tablespoon cookie scoop (like Wilton’s) helps portion the dough evenly for perfect-sized cookies. 🍯
Chilling Solutions
Chilling the dough is where patience pays off. I use plastic wrap to tightly seal the dough disks, but a vacuum sealer works even better for longer storage.
For quick chilling, place the dough on a wire cooling rack in the freezer for 30 minutes—this firms it up faster than the fridge. If you’re short on time, freeze the dough balls for up to 3 months—just thaw in the fridge before baking. 🧊
Baking Sheet Setup
Line your baking sheets with parchment paper or silpat mats to prevent sticking and ensure easy cleanup. I use half-sheet pans (13x18 inches) because they fit more cookies at once.
Preheat your oven for at least 15 minutes to ensure even baking. A digital thermometer (like Thermoworks Oven Thermometer) helps maintain the 350°F temperature—ovens can vary wildly! 🌡️
Cooling and Storage Containers
Let cookies cool on the baking sheet for 5 minutes before transferring to a wire rack—this prevents soggy bottoms. For storage, use glass airtight containers (like Pyrex) with parchment paper between layers to keep them fresh.
If freezing, place cookies in a single layer on a tray first to prevent sticking. A vacuum-sealed bag extends freshness for up to 3 months. 💫
Nutrition facts
Frequently asked questions
Why do these cookies need to chill before baking?
Chilling the dough for at least 2 hours prevents excessive spreading and helps develop deeper molasses flavor. The cold butter creates crisp edges while keeping centers chewy. Skipping this step often results in flat, cake-like cookies instead of the signature thick, crackly texture.
Can I substitute sulphured molasses?
Yes, but expect a slightly different flavor profile. Sulphured molasses has a more bitter, tangy taste that works well in gingerbread but lacks the pure sweetness of unsulphured. For authentic results, use Goya or Cumberland unsulphured molasses—they're worth the search!
How do I fix cookies that spread too much?
Next time, chill the dough longer (24 hours works best) and flatten the scooped dough slightly before baking. For already-baked flat cookies, try warming them in the oven for 3-5 minutes at 300°F—they'll puff slightly from residual moisture. The 350°F oven temp is critical; hotter temps cause more spreading.
Should I add a glaze or icing?
These cookies are delicious plain, but a simple vanilla glaze (powdered sugar + milk) enhances their natural sweetness. For extra sparkle, dust with cinnamon sugar or add crushed pecans. Grandma's version often had just a light dusting of powdered sugar—keep it simple for that authentic touch!
Can I make these cookies without a mixer?
Use a sturdy wooden spoon or hand mixer. Cream the butter and sugars by hand for 5-7 minutes** until light and fluffy—your arm will thank you for the workout! The key is patience; keep scraping the bowl to ensure even mixing. The dough will be slightly less airy but still delicious.