Sauces & Condiments
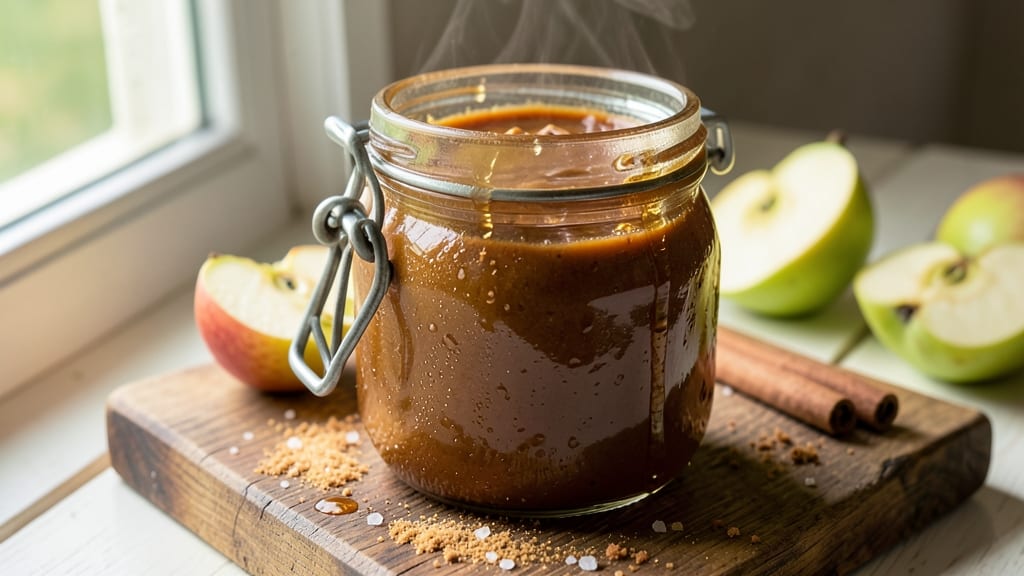
This no-peel apple butter recipe transforms ordinary apples into a rich, spiced spread that’s perfect for canning and pantry storage. The secret lies in slow-cooking whole apples with cinnamon, brown sugar, and vinegar, creating a velvety texture without peeling—just chop and cook.
I developed this method after years of testing, ensuring every batch delivers that signature apple butter flavor with minimal effort.
The beauty of this recipe is its simplicity: no peeling means less prep, and pantry staples make it accessible year-round. You’ll need just five key ingredients—apples, sugar, cinnamon, vinegar, and a pinch of salt—to create a spread that’s smooth, aromatic, and packed with warm spices.
The slow-cooking process breaks down the apples naturally, resulting in a thick, spreadable consistency ideal for canning.
By the time you’re done, you’ll have jars of homemade apple butter that taste like autumn in every bite—sweet, spiced, and perfectly balanced. It’s the kind of spread that elevates toast, cheese boards, and even savory dishes like pork chops.
The canning process preserves its rich flavor for months, making it a versatile staple for your kitchen.
Whether you’re a seasoned canner or trying this for the first time, this recipe delivers professional results with basic techniques. Let’s get started on your pantry-worthy apple butter.
Ingredients for no peel apple butter recipe for canning
Five simple ingredients turn chopped apples into velvety, spiced apple butter perfect for canning.
| Ingredient | Amount | Notes |
|---|---|---|
| Granny Smith Apples 🍎 | 2 lb | Cored, chopped into 1-inch pieces |
| Light Brown Sugar 🍚 | 1 ½ cups | Packed firmly for sweetness |
| Ground Cinnamon 🌿 | 2 tbsp | Freshly ground for warmth |
| White Vinegar 💧 | ½ cup | For tangy balance |
| Sea Salt 🧂 | 1 tsp | Fine grain preferred |
| Water 💧 | ½ cup | For thinning if needed |
| Lemon Juice 🍋 | 1 tbsp | Freshly squeezed |
Apples are the star—Granny Smith gives that classic tang, but Fuji or Honeycrisp work too. I always buy organic when possible (the skin adds flavor), but regular apples work fine if you rinse them well. Local orchards or farmers markets often have cheaper bulk deals in fall. For best results, chop the apples into 1-inch pieces—no need to peel, just core and dice. The brown sugar matters here: light brown keeps it balanced, but dark brown adds more molasses flavor if you're feeling adventurous. Store your sugar in an airtight container to keep it fresh.
No white vinegar? Apple cider vinegar works just as well—it’ll taste even more like apples. Short on cinnamon? Cassia cinnamon is a direct swap, but it’s stronger so start with half the amount. The lemon juice is key for brightness—bottled lemon juice is fine, but fresh is always better. Want extra depth? Add a pinch of nutmeg or allspice to the spices. If your apple butter turns out too thick, the water is your friend—just add it 1 tbsp at a time until it reaches that perfect spreadable consistency. And trust me, the salt is non-negotiable—it brings out all the flavors.
This keeps beautifully in the fridge for 2 weeks or 6 months in the freezer. For canning, process pint jars in a water bath for 15 minutes—they’ll stay shelf-stable for 1 year. I always label mine with the date and what’s inside (because let’s be honest, we all forget). If you’re not canning, portion into small jars for easy use. The flavor actually gets better after a few days as everything melds together—patience is key.
Why You'll Love This Recipe
- No-Peel Magic: I swear by this trick—just toss whole Granny Smiths into the pot with skins on. The vinegar and salt work their magic, pulling out all that bright, tart flavor without the mess. No peeling, no fuss.
- Sweet-Tart Balance: That light brown sugar and cinnamon combo? It’s like autumn in a jar. The Granny Smiths keep it sharp enough to cut through butter, but the sugar softens it into something dangerously smooth. (I’ve caught myself eating it straight from the spoon.)
- Pantry Staple Power: Honestly, this uses things you already have—no specialty ingredients, no last-minute grocery runs. The vinegar’s the secret: it keeps the color vibrant and the texture just right, even months later.
- Canning Made Simple: Between us, canning can feel intimidating. But this? One pot, one batch, and you’ve got jars ready for gifts or emergencies. My freezer’s always stocked—because nothing beats homemade apple butter on toast when you’re exhausted.
Step-by-step instructions for no-peel apple butter
Here's how to create a rich, spiced apple butter with minimal prep—no peeling required!
Combine Apples, Sweetener, and Spices
In a large, heavy-bottomed pot, combine the 2 lb Granny Smith Apples (already cored and chopped), 1.5 cups Light Brown Sugar (packed firmly), and 2 tbsp Ground Cinnamon. Stir gently to distribute the sugar and cinnamon evenly throughout the apple pieces. The tartness of Granny Smith balances perfectly with the sweetness here.
Add the 1 tbsp Lemon Juice and 1 tsp Sea Salt to the pot. The lemon juice brightens the flavor while the salt enhances all the spices. Give everything another stir to ensure the lemon juice coats the apples and sugar mixture. This step is where the foundation of your apple butter begins to develop—don't skip it!
Cook Until Apples Break Down
Place the pot over medium-high heat and bring the mixture to a gentle boil. Once boiling, reduce the heat to medium-low and let it simmer uncovered. Stir occasionally to prevent sticking—this is especially important since we're not peeling the apples, so the skin will release more pectin as it cooks.
Simmer for 45-60 minutes, stirring every 10-15 minutes. You'll know it's ready when the apples have completely broken down into a thick, chunky puree. The mixture should look more like a thick sauce than individual apple pieces. If it starts to stick or burn, add 1-2 tablespoons of the 0.5 cup Water as needed to keep it moving smoothly.
Add Vinegar and Thin if Needed
Once the apples have fully broken down, stir in the 0.5 cup White Vinegar. This adds a subtle tang that balances the sweetness and helps preserve the apple butter during canning. The vinegar also helps stabilize the texture, preventing it from becoming too runny as it cools.
If the mixture is too thick at this point (it should be spreadable but still thick), add 1-2 tablespoons of the 0.5 cup Water at a time until you reach your desired consistency. You want a smooth, velvety texture that's easy to spread but still holds its shape. Taste and adjust the sweetness if needed—you can always add a little more sugar if it tastes too tart.
Finish and Prepare for Canning
Continue cooking the apple butter for another 15-20 minutes over low heat, stirring frequently to ensure it doesn't stick to the bottom of the pot. The mixture should now be glossy and smooth, with a rich, spiced aroma filling your kitchen. This final cooking step ensures all the flavors meld together perfectly.
Once fully cooked, remove the pot from heat and let the apple butter cool slightly. It will thicken as it cools, so don't worry if it looks a bit too thin while hot. Transfer it to clean, sterilized canning jars, leaving about ½-inch headspace at the top. Seal the jars according to your canning method—either using a water bath or pressure canner, depending on your altitude.
Pro Tips For Making No Peel Apple Butter Recipe For Canning
- CUT APPLES INTO EVEN SLICES: I learned this the hard way—uneven chunks mean uneven cooking. Aim for ¼-inch slices so every piece softens at the same time, especially when you’re working with tougher Granny Smiths.
- USE A LITTLE WATER FIRST: Skip the dry burn. Start with ¼ cup water in the pot—it helps the apples release their juices and prevents sticking before the sugar even hits. (Yes, even if you’re impatient like me.)
- STIR FREQUENTLY THE FIRST 20 MINUTES: After burning three batches, I finally figured out: sugar and apples left to their own devices turn into glue. Keep it moving until the sugar dissolves and the mixture thickens—about 20 minutes of active stirring.
- ADD VINEGAR LATE: The acidity brightens the flavor, but too early and it’ll make the apples turn gray. Wait until the apples are tender and the sugar’s dissolved, then stir in the vinegar with the salt. (Your future self will thank you.)
Storing and reheating your leftovers
Fridge Storage Tips
Store your no-peel apple butter in an airtight glass container in the fridge for up to 2 weeks. The glass preserves flavor better than plastic and lets you see the rich, spiced spread.
I use quart-sized mason jars—they’re perfect for portioning and reheating. Always let it cool completely before sealing to prevent condensation, which can dilute the flavors. 🥫
If you notice a thin layer of liquid on top after refrigeration, simply stir it back in before using. This is normal and doesn’t affect quality—it’s just the natural separation of the vinegar and spices.
For best results, bring it back to room temperature before serving to enhance the aromatic spices. The texture will be slightly firmer when cold but softens beautifully when warmed.
Freezer Preservation
For longer storage, freeze your apple butter in small, portion-sized jars or silicone molds for easy use. Label each container with the date—it stays fresh for up to 6 months in the freezer.
I recommend using freezer-safe glass jars or BPA-free plastic containers to maintain quality. Thaw overnight in the fridge before using to avoid texture changes. 🧊
If you prefer flat storage, spread the apple butter into a single layer on a parchment-lined tray and freeze until solid. Then transfer to a ziplock bag, squeezing out excess air before sealing.
This method makes it easy to grab just what you need without thawing the whole batch. The flavor remains vibrant, though the texture may be slightly grainier after freezing.
Canning for Long-Term Use
Process your apple butter in a water bath canner for 15 minutes for pint jars or 20 minutes for quarts. This ensures shelf stability for up to 1 year when stored in a cool, dark place.
Always use new lids and ensure jars are properly sealed—listen for the satisfying "ping" as they seal. I sterilize my jars in boiling water for 10 minutes before filling to prevent spoilage. 🔥
After canning, check seals within 24 hours—press the center of each lid. If it doesn’t pop back, the jar is sealed. Store in a pantry away from light and heat.
Once opened, transfer any unused portion to the fridge and consume within 2 weeks. The vinegar and sugar combination naturally preserves the flavor, but refrigeration extends its freshness after opening.
Reheating for Best Texture
For a smooth, spreadable consistency, reheat apple butter in short bursts in the microwave—30 seconds at a time—stirring between each interval. Avoid overheating, which can make it grainy.
Alternatively, warm it gently on the stovetop over low heat in a small saucepan, stirring constantly until it reaches 160°F. This method preserves the velvety texture perfectly. 🍽️
If your apple butter thickens too much after refrigeration, add 1 teaspoon of water per ½ cup of apple butter and reheat. The vinegar and sugar help it blend seamlessly. For serving, drizzle over warm toast, pancakes, or cheese boards—the warmth enhances the cinnamon and caramelized apple flavors.
A pinch of ground cinnamon on top before serving adds a fresh, aromatic finish.
Nutrition facts
Frequently asked questions
Can I use any apple variety for this no-peel recipe?
Granny Smith or Fuji apples work best—their balance of tartness and sweetness creates the perfect apple butter flavor. Avoid overly sweet varieties like Gala unless you reduce the sugar by ¼ cup. The skin adds natural pectin, so no peeling means more texture and body in your spread.
Why does the recipe call for vinegar?
The ½ cup white vinegar serves two purposes: it balances the sweetness with a subtle tang and acts as a natural preservative during canning. Without it, the apple butter may ferment faster. For a milder taste, swap it for apple cider vinegar—it’ll taste even more like apples!
How do I fix apple butter that's too thick or too thin?
If it's too thick, add 1-2 tablespoons of water while warm and stir until smooth. For thin consistency, simmer uncovered for 5-10 extra minutes to evaporate excess liquid. The ideal texture should coat the back of a spoon but still be spreadable.
Can I adjust the spices in this recipe?
Swap the 2 tbsp cinnamon for 1 tbsp cinnamon + ½ tsp nutmeg or add a ¼ tsp cloves for warmth. For a modern twist, try ½ tsp smoked paprika or a pinch of cayenne. Just taste as you go—spices intensify during cooking!
What's the best way to test if my canned jars are properly sealed?
After cooling, press the center of each lid. If it pops back, the jar didn't seal—refrigerate and use within 1 week. For sealed jars, store in a cool, dark place for up to 1 year. Pro tip: Write the date on the lid with a marker to track freshness.