Snacks
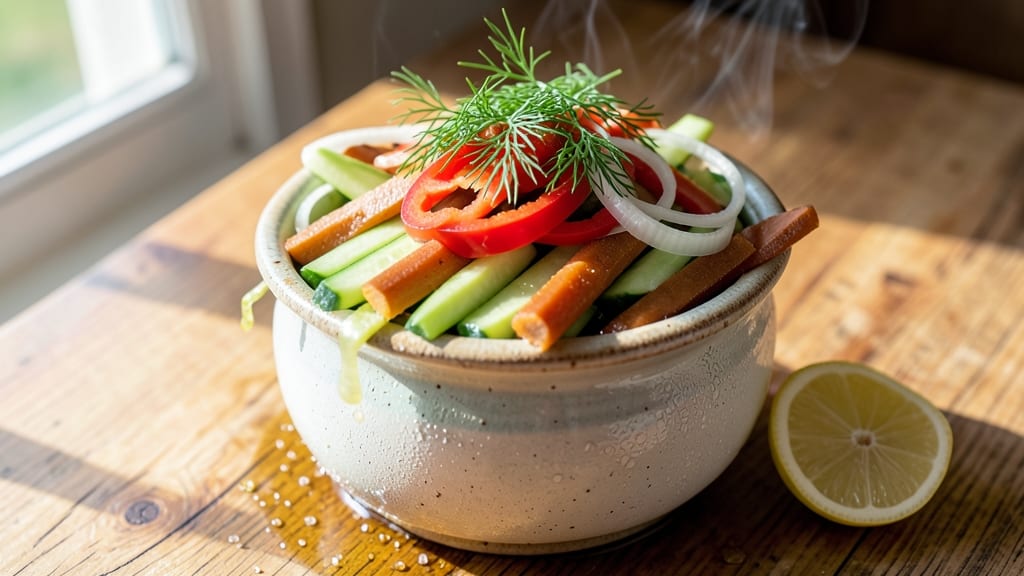
This pickled veg recipe transforms simple vegetables into tangy, crunchy bites that add bright flavor to any meal. The secret lies in balancing vinegar, salt, and sugar to create a brine that preserves texture while infusing bold taste—no fermentation required.
I developed this method after craving restaurant-quality pickles at home without the wait, and it delivers crisp vegetables in just 15 minutes of active time.
The beauty of this recipe is its versatility—whether you're quick-pickling cucumbers, carrots, or radishes, the same principles apply. The vinegar-based brine works fast, preserving color and crunch while adding that signature tang.
Perfect for snacking straight from the jar or elevating sandwiches, salads, and charcuterie boards, this method turns pantry staples into a flavor-packed side dish that keeps for weeks.
You’ll end up with vibrant, crisp vegetables bathed in a tangy, aromatic brine that’s bright enough to cut through rich dishes. The process is straightforward: slice your veggies, mix the brine, and let them sit while you prepare the rest of your meal.
No special equipment needed—just a jar, a bowl, and patience for the flavors to meld. This is the kind of recipe that transforms ordinary vegetables into something extraordinary with minimal effort.
For those who prefer fermentation, I’ll share variations later—this quick-pickle method is ideal for when you want flavor fast. Store the pickled veggies in the fridge for up to 4 weeks, and enjoy them as a snack, salad topper, or tangy contrast to grilled meats.
Let’s get started with the simplest way to brighten up your meals.
Ingredients for pickled veg
Quick-pickle your way to restaurant-quality crunch using just 13 simple ingredients.
| Ingredient | Amount | Notes |
|---|---|---|
| Fresh Cucumber 🥒 | 1 ½ lb | English or Persian, sliced into sticks |
| Carrots 🥕 | 1 lb | Baby or regular, cut into matchsticks |
| Red Bell Pepper 🌶️ | 1 whole | Sliced into thin strips |
| White Vinegar 💧 | 2 cups | Distilled preferred for clarity |
| Water 💧 | 2 cups | Filtered or bottled |
| Granulated Sugar 🍚 | ½ cup | White or raw cane |
| Diamond Crystal Kosher Salt 🧂 | ¼ cup | Not iodized, for proper balance |
| Garlic Cloves 🧄 | 4 cloves | Thinly sliced for subtle flavor |
| Fresh Dill 🌿 | ¼ cup | Chopped, stems removed |
| Black Peppercorns 🌶️ | 1 tsp | Crushed lightly for texture |
| Mustard Seeds 🌶️ | 1 tsp | Yellow or brown, whole |
| Red Chili Flakes 🌶️ | ½ tsp | Adjust for heat preference |
| Fresh Juniper Berries 🌲 | 2 whole | Optional, crushed for aroma |
The vegetables are the stars here—English cucumbers stay crunchier than Persian, but either works. Whole Foods or Trader Joe's usually carry pre-washed organic options for convenience. For the bell pepper, red is ideal—it holds its color best in the brine. If you're using conventional produce, give it a quick soak in vinegar water to remove any wax coatings. The garlic and dill are non-negotiable for flavor, but if you're short on fresh dill, dried dill at one-third the amount will work in a pinch. For the vinegar, distilled white vinegar gives the clearest brine, but apple cider vinegar adds a nice fruity note if you prefer that tang.
No kosher salt? Diamond Crystal is ideal, but fine sea salt at half the amount works too—just taste as you go. Running out of mustard seeds? Ground mustard at one-tenth the amount gives a similar punch. The chili flakes can be swapped for cayenne pepper, but adjust carefully—it packs more heat. For a smoky twist, add 1 tsp smoked paprika to the brine. If you're feeling adventurous, fresh herbs like tarragon or thyme elevate the flavor profile. The juniper berries are optional but add a sophisticated piney aroma—if you can't find them, skip them without missing much.
This pickle keeps beautifully for 4 weeks in the fridge, with the flavors deepening over time. For best results, store in glass jars with airtight lids—plastic can absorb odors. The vegetables stay crisp for about 2 weeks before softening slightly. I like to portion mine into small jars for snacking and larger ones for meal prep. If you make extra, the brine freezes well for up to 3 months—just thaw and reuse with fresh veggies. The pickles reheat beautifully in warm soups or salads, though they're best at room temperature for snacking.
Why You'll Love This Recipe
- No Chopping Chaos: I swear by the "thick slice" trick—just grab a knife, halve the cucumbers and bell peppers, and leave the carrots in plump rounds. No julienne skills needed, and the texture stays perfect.
- Tangy Crunch Magic: That vinegar-water brine? It’s the secret weapon. The cucumbers stay crisp, the carrots get this addictive soft-crunch, and the bell peppers? Sweet with a little bite—like summer in a jar.
- Meal Prep MVP: Between us, this is my go-to for lunches, charcuterie boards, or even a quick sandwich topper. Make a big batch on Sunday, and you’re set for the week—no sad wilted veggies here.
- Dollar Stretch Wonder: Cucumbers, carrots, and bell peppers are cheap, and vinegar lasts forever. For under $5, you’ve got a jar of flavor that lasts weeks—way better than buying fancy pickles at the store.
Step-by-step instructions for vinegar-bright crunch in 15 minutes
Here's how to transform crisp vegetables into vibrant, tangy pickles with perfect texture in record time.
Prep Vegetables for Even Pickling
Begin by thoroughly washing all vegetables under cold water. For the 1.5 lb fresh cucumber, cut into ½-inch thick sticks—this size ensures they pickle quickly without turning mushy. I use a sharp chef's knife for clean cuts, and I remove any blemished spots since they can spoil faster.
Next, peel the 1 lb carrots if you prefer a smoother texture, then cut into matchsticks of uniform length. For the 1 whole red bell pepper, slice into ¼-inch thick strips—thinner slices will pickle faster. Remove the core and seeds first. Spread each vegetable type on a clean kitchen towel to dry completely before proceeding. This step prevents cloudy brine and ensures vibrant color in your finished pickles.
Combine Brine Ingredients
In a large, non-reactive bowl (I use glass or stainless steel), whisk together the 2 cups white vinegar and 2 cups water until fully combined. Add the 0.5 cup granulated sugar and stir until completely dissolved—this sweetens the acidity and balances the tang. Then sprinkle in the 0.25 cup diamond crystal kosher salt and mix until it disappears entirely.
Add the 4 cloves garlic cloves (thinly sliced), 1 tsp black peppercorns (lightly crushed), 1 tsp mustard seeds, and 0.5 tsp red chili flakes. If using, gently crush the 2 whole fresh juniper berries between your palms before adding them—their piney aroma adds depth. The mixture should smell aromatic and slightly spicy. Let the brine sit for 5 minutes while you prepare the remaining ingredients.
Layer Vegetables and Herbs
Transfer the prepared vegetables to a quart-sized mason jar or airtight container. I pack them tightly but avoid mashing—this preserves their crisp texture. Sprinkle ½ of the 0.25 cup fresh dill (chopped) evenly over the vegetables, then pour the brine mixture over them, ensuring all pieces are submerged. The acidity will penetrate faster when fully covered.
Gently press down on the vegetables with a clean spoon or spatula to remove any air bubbles trapped between pieces. This prevents mold growth and ensures even pickling. Top with the remaining 0.25 cup fresh dill, then seal the jar tightly. The herbs will infuse their bright flavor into the brine over time.
Refrigerate for Perfect Texture
Place the sealed jar in the refrigerator and let it pickle for at least 12 hours—this is the minimum time for safe preservation and flavor development. For best results, I recommend 24 hours for deeper flavor and crunch. The vegetables should remain crisp but absorb some of the tangy brine.
After the initial 12 hours, taste a piece of cucumber. It should be pleasantly tart with a bright vinegar bite, not overly sour. If you prefer a milder flavor, leave it for 36 hours; for extra tang, extend to 48 hours. The carrots and bell pepper will take slightly longer to reach peak texture—check them at the 24-hour mark for readiness.
Store and Serve
Once the pickles reach your desired level of tanginess, transfer them to a clean, airtight container if not using the original jar. They'll keep in the refrigerator for up to 2 weeks, though I find they're best within the first 10 days for maximum crunch. The brine should cover the vegetables completely—if not, add a little extra from the jar to preserve them properly.
Serve these vibrant pickles as a refreshing side dish, sandwich topping, or garnish for salads. The combination of crisp vegetables, tangy vinegar, and aromatic herbs creates a bright contrast that elevates any meal. For extra flair, sprinkle with additional fresh dill before serving—it adds a pop of color and freshness that complements the pickled flavors perfectly.
Pro Tips For Making Pickled Veg
- USE SLICED CUCUMBERS, NOT CHUNKS: Thin, even slices (about ⅛-inch thick) pickle faster and stay crisp—no one wants soggy, mushy cucumbers after a week. I used to cut them into random chunks, and they’d turn to mush in days. Stick to slices for that perfect crunch.
- SALT THE VEGETABLES BEFORE PICKLING: Toss carrots, bell peppers, and cucumbers with 1–2 teaspoons of salt (yes, even more than you’d use for a salad) and let them sit for 30 minutes. This draws out excess water, making the final brine sharper and the veggies firmer. I skipped this once and regretted it—watery, bland pickles every time.
- DON’T SKIP THE SIMMER: Bring your vinegar-water mix to a full boil for 2–3 minutes before pouring it over the veggies. This sterilizes the brine and ensures the pickles stay crisp longer. I used to just mix it cold, and my pickles would go soft within a week. Two minutes of simmering makes a real difference.
- ADD SPICES AFTER COOLING: Toss in garlic, mustard seeds, or dill after the brine has cooled to room temperature. If you add them hot, they’ll cook and lose their punch. I learned this the hard way—my first batch tasted like sad, overcooked spices. Wait until the jar’s cool, then stir them in.
Common mistakes when making this dish
Uneven Vegetable Sizes
I’ve ruined more pickles than I’d like to admit by using uneven vegetable cuts. Thick slices take forever to pickle and often turn mushy, while thin slices can get overpowered by the vinegar too quickly.
Stick to ¼-inch to ½-inch slices for consistent texture—this ensures all your veggies hit the same crunch level at the same time. 🥕
Skipping the Sugar
Some recipes omit sugar entirely, but I’ve found it’s essential for balancing the acidity. Without it, your pickles can taste harshly vinegary. Use ½ cup granulated sugar to sweeten the brine—it’s not just about flavor, but also about preserving the veggies’ texture by preventing over-softening.
Trust me, your taste buds will thank you.
Not Submerging Veggies
If your veggies aren’t fully submerged in the brine, they’ll develop mold or spoil faster. I’ve learned the hard way that even a tiny exposed spot can ruin the whole batch.
Pack your jar tightly and pour enough brine to cover everything by at least ½ inch. If needed, add extra brine from a separate jar to ensure full coverage.
Using Reactive Containers
Aluminum or cheap plastic containers can react with the vinegar, altering the flavor and even causing discoloration. Always use glass or food-grade stainless steel for your brine and storage.
I swear by quart-sized mason jars—they’re non-reactive, airtight, and easy to store in the fridge. Skip the flimsy plastic, even if it’s tempting for convenience.
Rushing the Pickling Time
I get it—you want your pickles now. But rushing the 12-hour minimum leads to underdeveloped flavor and uneven texture. The acid needs time to penetrate the veggies, and the herbs need time to infuse.
If you’re short on time, at least let them sit for 6 hours, but 24 hours is ideal for that perfect tangy crunch. Patience pays off here!
Ignoring the Dill
Fresh dill isn’t just for garnish—it’s a flavor powerhouse in pickles. Skipping it (or using dried instead of fresh) results in bland, one-dimensional pickles. Sprinkle ½ the dill in the jar and save the rest for topping.
Pro tip: If you’re out of fresh dill, 1 tbsp dried dill works in a pinch, but it won’t have the same bright punch. 🌿
Nutrition facts
Frequently asked questions
Can I use this quick-pickle method with other vegetables?
This recipe works beautifully with radishes, green beans, cauliflower florets, or even asparagus. For best results, stick to firm vegetables that hold their shape—avoid leafy greens like spinach or lettuce, as they'll wilt. The key is uniform slicing (¼-inch to ½-inch) for even pickling.
How do I adjust the spice level for kids or sensitive palates?
Simply reduce or omit the red chili flakes entirely. For a milder kick, swap them with ½ tsp sweet paprika instead. You can also remove the mustard seeds if you prefer a smoother flavor profile. The garlic and dill will still provide aromatic depth without the heat.
Can I make these pickles without vinegar?
This recipe relies on vinegar for quick preservation and tangy flavor, but you can experiment with lemon juice for a milder version. Use 1.5 cups lemon juice plus ½ cup water instead of the vinegar-water mix, and reduce sugar to ¼ cup to balance the acidity. Note that lemon-pickled veggies won't last as long (1 week max) and may soften faster.
What's the best way to use up extra brine?
Store leftover brine in an airtight container in the fridge for up to 3 months. Use it to pickle fresh batches of veggies, marinate proteins like chicken or tofu, or even deglaze pans for sauces. The vinegar and spices add great depth to any dish! For extra flavor, add 1 tsp honey or maple syrup when reheating the brine.
How do I revive limp pickled vegetables?
If your pickles lose their crunch after a few weeks, don't toss them! Drain the veggies and soak them in ice water for 10 minutes to firm them up. Then return them to fresh brine (or even just vinegar and water) for 1-2 hours before serving. This works especially well for carrots and cucumbers. For extra crunch, add 1 tsp cornstarch to the revitalizing brine.