Desserts
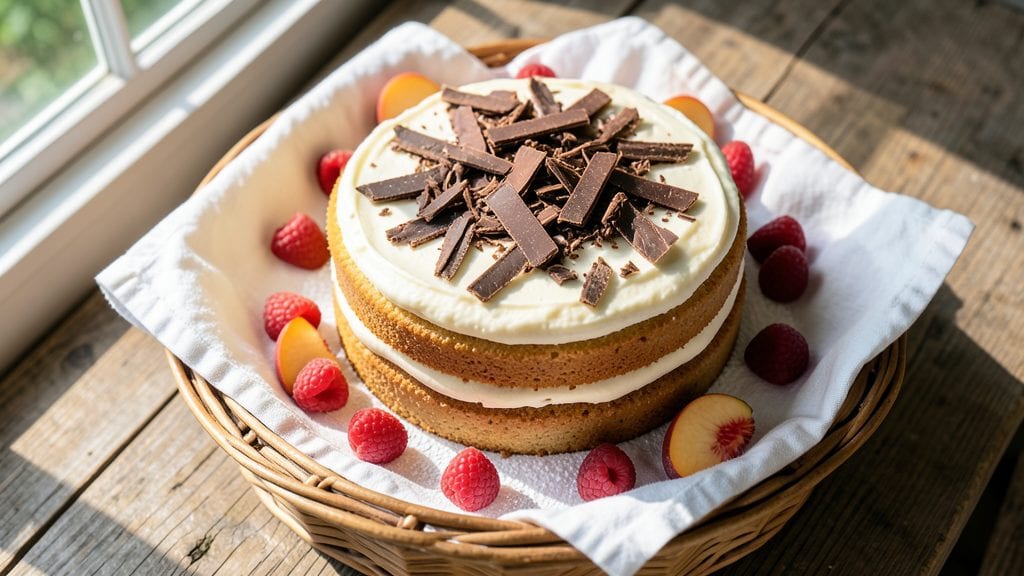
This picnic cake recipe delivers the perfect balance of light vanilla layers and vibrant berry filling—ideal for outdoor gatherings where portability and flavor matter most.
The secret lies in using a simple yet sturdy vanilla sponge cake that holds up beautifully when stacked, paired with a luscious berry compote that adds moisture and sweet-tart contrast.
I’ve tested this recipe countless times at family picnics, and it never fails to impress without requiring fancy equipment or hours in the kitchen.
What makes this cake truly special is its foolproof structure: three delicate vanilla layers separated by that jammy berry filling, all topped with a smooth vanilla buttercream that keeps the cake stable yet elegant.
The recipe calls for basic pantry staples—flour, sugar, eggs, and butter—along with fresh or frozen berries for the filling, making it accessible for any home baker.
With just under an hour of active time and a total bake time of about 45 minutes, this cake is designed to fit seamlessly into a picnic prep routine.
The result is a cake that’s as beautiful as it is delicious—light enough to carry without crumbling, yet rich enough to satisfy a crowd.
Each slice offers the perfect harmony of fluffy vanilla cake, tangy berry filling, and creamy buttercream, all in bite-sized portions that are easy to serve from a picnic basket. The layers stay moist for hours, making it ideal for outdoor events where you don’t want to worry about drying out.
For added versatility, you can swap the berry filling for lemon curd or chocolate ganache, or even add a dusting of powdered sugar or fresh berries on top for extra flair.
Whether you’re packing it for a lakeside picnic or a backyard barbecue, this cake delivers restaurant-quality dessert with minimal fuss. Let’s get baking!
Ingredients for picnic cake
Basic pantry staples plus a handful of fresh ingredients—this picnic cake comes together faster than you'd think.
| Ingredient | Amount | Notes |
|---|---|---|
| All-Purpose Flour 🌾 | 2 ½ cups | Sifted for light texture |
| Granulated Sugar 🍚 | 2 cups | Divided for cake and filling |
| Unsalted Butter 🧈 | 1 ½ cups | Room temperature, full-fat |
| Large Eggs 🥚 | 6 whole | Room temperature, separated |
| Vanilla Extract 🌿 | 2 tsp | Pure, high-quality extract |
| Baking Powder 🧂 | 2 tsp | Freshly opened for lift |
| Salt 🧂 | ½ tsp | Fine sea salt |
| Mixed Berries 🍓 | 2 ½ cups | Fresh or frozen, thawed |
| Lemon Juice 🍋 | 1 tbsp | Freshly squeezed |
| Powdered Sugar 🍚 | 3 cups | For buttercream |
| Heavy Cream 🥛 | 1 cup | Cold for buttercream |
| Cornstarch 🌾 | 1 tbsp | For berry filling |
The butter and eggs are non-negotiable here—room temperature makes all the difference for fluffy layers. Grab the highest-quality butter you can find (like Plugrá or Land O’Lakes Creamery), and if you're using frozen berries, thaw and drain them well—no one wants a soggy cake. The vanilla extract should be pure, not imitation. For the berries, strawberries and blueberries work best, but raspberries add a nice tang. If you're short on time, Trader Joe's frozen berry mix is a lifesaver and keeps for months.
No vanilla extract? Vanilla bean paste or even a scraped vanilla bean will do in a pinch. The buttercream can be made with margarine in a bind, but trust me on the full-fat version. For the berry filling, if you can't find fresh berries, jam or compote from a jar works too—just thin it with a splash of water. The cornstarch is key for thickening that filling—don't skip it! And if you're worried about the cake drying out, wrap it tightly in plastic wrap before packing for the picnic.
This cake keeps beautifully—3-4 days at room temperature if wrapped well, or up to 5 days in the fridge. For picnics, I like to assemble it a day ahead so the flavors meld. The buttercream can be made 2 days ahead and stored in the fridge, just whip it back up with a splash of milk before using. If you're packing it for a long trip, freeze the cake layers separately—they thaw quickly and taste just as good.
Why You'll Love This Recipe
- No Mixer Needed: I swear by this recipe on lazy Sundays—just cream the butter and sugar by hand (yes, it’s that simple), then fold in the eggs and vanilla. The batter’s so forgiving that even if I forget to sift the flour, the texture still turns out light and tender.
- Vanilla Buttercream Magic: That rich vanilla extract? It’s the star. The cake itself is moist but not heavy, and the buttercream—made from the same butter and sugar—adds a velvety sweetness that’s dangerously easy to over-slice. Honestly, I’ve made it for birthdays, showers, and just-because treats, and it never disappoints.
- Picnic to Party: This cake’s my go-to for any gathering—slice it into squares for a picnic, stack it for a dessert buffet, or even serve it warm with ice cream. The flour and sugar ratio keeps it sturdy enough to travel, yet light enough to eat without a crumbly mess. (Yes, even on a Tuesday night.)
- Budget-Friendly Staples: I use this recipe all the time because it’s packed with pantry basics—flour, sugar, butter, eggs, and vanilla. No fancy ingredients, no last-minute store runs. The leftovers? They keep for days, and I’ve reheated slices in the oven for breakfast (don’t judge—it’s ridiculously good with a drizzle of honey).
Step-by-step instructions for picnic cake recipe
Let's create a showstopper picnic cake with light vanilla layers and vibrant berry filling that'll impress everyone.
Prepare the Vanilla Cake Layers
Preheat your oven to 350°F and grease three 8-inch round cake pans, then line the bottoms with parchment paper. In a large mixing bowl, combine the 2.5 cups all-purpose flour, 2 tsp baking powder, and 0.5 tsp salt. Whisk together until evenly distributed—this ensures your cake layers will rise evenly and stay tender.
In a separate, larger bowl, cream together the 1.5 cups unsalted butter and 1 cup of the granulated sugar until light and fluffy, about 3-4 minutes. Add the 6 whole large eggs, one at a time, beating well after each addition. Mix in the 2 tsp vanilla extract and remaining 1 cup granulated sugar until fully combined. Gradually add the dry ingredients to the wet, mixing just until incorporated—overmixing develops gluten, which can make your cake dense.
Divide the batter evenly among the prepared pans. Bake for 25-30 minutes, or until a toothpick inserted into the center comes out clean. Let the layers cool in their pans for 10 minutes, then transfer to a wire rack to cool completely before assembling.
Create the Berry Filling
In a medium saucepan, combine the 2.5 cups mixed berries, 1 tbsp lemon juice, and 1 tbsp cornstarch. Cook over medium heat, stirring constantly, until the mixture thickens and bubbles, about 5-7 minutes. Remove from heat and let it cool completely—this prevents the filling from melting when you assemble the cake.
Here's the thing—if your berries are particularly juicy, you might need to adjust the cornstarch slightly. If the filling is too runny after cooling, cook it for an extra 1-2 minutes to thicken further. The filling should be spreadable but still hold its shape when layered.
Make the Buttercream Frosting
In a large mixing bowl, beat the 1 cup heavy cream until it begins to thicken and soften slightly, about 1-2 minutes. Gradually add the 3 cups powdered sugar, mixing on low speed until combined. Increase the speed to medium and beat for 3-4 minutes until the frosting is smooth, fluffy, and holds its shape when piped.
For extra flavor, you can add a splash of the 2 tsp vanilla extract if desired, but the powdered sugar already provides a sweet base. The frosting should be thick enough to hold peaks when spread but still soft enough to pipe smoothly—this creates that classic buttercream texture perfect for decorating.
Assemble the Picnic Cake
Place the first cake layer on a cake stand or plate. Spread a thin layer of the berry filling over the top, leaving a ½-inch border uncovered. This prevents the filling from oozing out the sides when you slice the cake later. Repeat with the remaining two layers, finishing with the last layer on top.
Spread a generous layer of the buttercream frosting over the top and sides of the cake, using an offset spatula to create a smooth finish. For a rustic picnic look, you can pipe swirls or rosettes around the edges, or simply leave it as a simple sheet cake for easy serving. Chill the cake in the refrigerator for at least 1 hour before slicing—this helps it hold its shape and keeps the layers intact.
Serve and Enjoy
Slice the cake into 12 equal portions using a sharp serrated knife. For cleaner cuts, dip the knife in hot water and wipe it dry between slices. The layers should be perfectly balanced—light vanilla cake with bursts of tangy berry filling and creamy buttercream in every bite.
This picnic cake is perfect for outdoor gatherings, potlucks, or even a simple family dessert. The stackable layers make it easy to transport, and the combination of flavors ensures everyone will love it. Serve with fresh berries on the side for an extra touch of freshness!
Pro Tips For Making Picnic Cake
- Cream Butter Properly: DESCRIPTION: Dump cold butter cubes into warm sugar and mash with a wooden spoon until just combined—no need to overwork it. I used to pulse this in a food processor, but the cake ends up denser. By hand, you’ll get that light, fluffy texture without turning the batter into glue.
- Sift the Flour Twice: DESCRIPTION: Measure your flour into the bowl first, then sift it again right before folding it in. This cuts out lumps and aerates the batter, which makes a noticeable difference in how tender the cake turns out—especially if your kitchen humidity is playing tricks on you.
- Don’t Overmix the Eggs: DESCRIPTION: Whisk the eggs and sugar together until the mixture is just pale and ribbony—about 30 seconds. After burning through three batches of overmixed batter (which made the cake tough as a boot), I learned to stop when the sugar dissolves completely. No need to chase a meringue-like consistency here.
- Test for Doneness with a Toothpick: DESCRIPTION: Stick a toothpick in the center and pull it out—if it comes out with moist crumbs (not wet batter), it’s done. I’ve seen recipes say “clean toothpick,” but this cake is moist, not dry. Pull it too early, and you’ll end up with a gummy center that’ll make your picnic guests side-eye you.
Perfect pairings for picnic cake
Berry-Inspired Sides
Fresh berries are the ultimate picnic companion—toss a mix of strawberries, blueberries, and raspberries with 1 tbsp honey and a pinch of flaky sea salt for a quick salad. Serve in small, portable containers or skewer them on toothpicks for easy grabbing.
I love adding a few mint leaves for brightness—it’s refreshing and pairs perfectly with the cake’s sweetness. 🍓
Citrusy Beverage Pairings
A chilled sparkling lemonade or sparkling limeade cuts through the richness of the cake beautifully. Mix 1 cup freshly squeezed lemon juice, ½ cup honey, and 4 cups sparkling water for a fizzy, tangy drink.
For a non-alcoholic twist, try hibiscus iced tea—it’s naturally tart and vibrant. If you’re serving alcohol, a crisp Prosecco or Moscato d’Asti adds a celebratory touch. 🍋
Crunchy Additions
Add texture with a side of homemade shortbread cookies or store-bought amaretti cookies for dipping. For a savory contrast, pack crusty baguette slices with whipped goat cheese and a drizzle of honey. These pairings balance the cake’s sweetness and add variety to your picnic spread. ✨
Sweet Extras for Serving
Drizzle the cake with warm berry compote> or a light vanilla glaze> before serving for extra shine. A sprinkle of edible flowers> or toasted coconut flakes**> adds a festive touch without overpowering the flavors.
For a nostalgic picnic vibe, arrange slices on a tiered cake stand with fresh berries scattered around. 🌸
Nutrition facts
Frequently asked questions
Can I make this picnic cake in a single layer instead of three?
For a simpler version, bake just one 9-inch round pan or a 9x13-inch sheet pan instead of three layers. Spread the berry filling evenly over the cooled cake, then top with buttercream. This works perfectly for easy transport and serving—just slice with a serrated knife for clean pieces. The flavor stays the same, just with fewer layers to assemble.
How do I keep the cake from getting soggy during transport?
Wrap each cake layer individually in plastic wrap while still warm, then store them in an airtight container at room temperature until assembly. For extra protection, place a sheet of parchment paper between layers before adding filling. If transporting the fully assembled cake, keep it in a cool, shaded spot—never in a hot car. The buttercream acts as a moisture barrier, but chilling for 1 hour before packing helps too.
What’s the best way to serve this cake at a picnic?
For easy serving, slice the cake into 12 individual portions and arrange them on a tiered cake stand or in a decorative box. Pack slices in parchment-lined containers with a small plate on top to protect the frosting. Serve with disposable forks or skewers for no-mess eating. For a rustic touch, wrap slices in wax paper and tie with twine—guests can unwrap and enjoy as they please.
Can I substitute the berry filling with something else?
Yes! Swap the berry filling for lemon curd (cooled completely), chocolate ganache, or even coconut cream for a tropical twist. For a fruity alternative, try mango purée or strawberry jam—just adjust the cornstarch to thicken if needed. The key is using a filling that’s spreadable but not runny to keep the layers stable.
How far ahead can I prepare the cake layers?
Baked cake layers can be stored at room temperature in an airtight container for up to 3 days or frozen for 1 month. The buttercream can be made 2 days ahead and refrigerated, then whipped back to fluffiness with a splash of milk before using. Assemble the cake just before serving to keep it fresh—this recipe is perfect for making-ahead stress-free picnics!