Salads
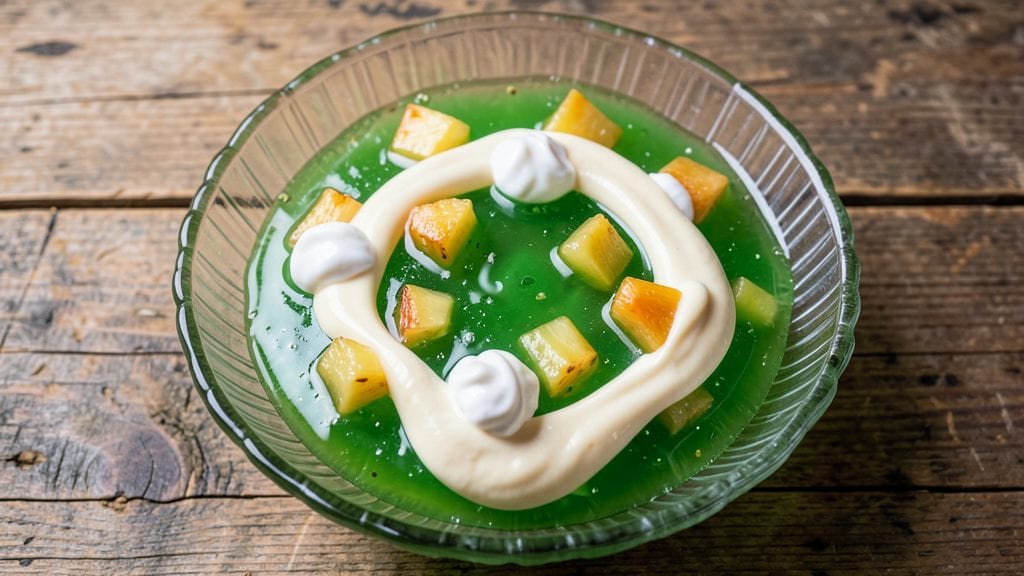
Grandma's green jello salad recipe brings back the nostalgia of childhood potlucks with its creamy layers and sweet pineapple crunch. 💛 I first learned this recipe from my grandmother's handwritten notes, and it's been a staple at family gatherings ever since.
The combination of cool gelatin, creamy mayo, and sweet pineapple creates a texture that's both refreshing and satisfying.
This classic dish is surprisingly simple to make, requiring just a few basic ingredients and some patience for the gelatin to set properly. The secret to achieving those perfect creamy layers lies in carefully alternating the jello mixture with mayonnaise and crushed pineapple.
It's a dish that's perfect for holiday meals, potlucks, or even as a nostalgic side for summer barbecues.
What you'll end up with is a vibrant green salad that's creamy, slightly sweet, and packed with that nostalgic flavor that takes you right back to your grandmother's kitchen.
The layers hold together beautifully when chilled, creating a visual appeal that's as impressive as it is delicious. This is comfort food at its finest—simple yet special.
The best part? This recipe can be made ahead of time, so it's perfect for busy hosts or anyone looking to impress with a classic dish. Let's get started on recreating this timeless family favorite that's sure to become a new tradition in your home.
Ingredients for grandma's green jello salad
Just 12 ingredients for that perfect retro green jello salad your grandma made.
| Ingredient | Amount | Notes |
|---|---|---|
| Green Gelatin 🟢 | 2 packages | Unflavored or lime flavor preferred |
| Boiling Water 💧 | 2 cups | Freshly boiled for best results |
| Mayonnaise 🥛 | 1 ½ cups | Full-fat for creaminess |
| Crushed Pineapple 🍍 | 1 can | 20 oz drain well, reserve juice |
| Sour Cream 🍦 | ½ cup | Full-fat for best texture |
| Food Coloring 🎨 | ½ tsp | Green gel or mix of blue/yellow |
| Granulated Sugar 🍚 | ¼ cup | For sweetness balance |
| Vanilla Extract 🌸 | 1 tsp | Pure for authentic flavor |
| Salt 🧂 | ¼ tsp | Kosher or sea salt |
| Maraschino Cherries 🍒 | ½ cup | Chopped, for garnish |
| Whipped Cream 🍦 | ½ cup | Optional topping |
| Pineapple Juice 🍍 | ¼ cup | From drained crushed pineapple |
The gelatin is the heart of this dish—Knox brand works best for those perfect creamy layers. Grab the unflavored kind if you want to control the color yourself, or lime-flavored for that classic tang. Trader Joe's usually has great prices on bulk gelatin, and it keeps for years in your pantry. The crushed pineapple? Dole brand is my go-to—they drain really well and aren't too watery. Always drain it completely and reserve that juice for extra sweetness later. For the food coloring, Wilton's gel food coloring gives you the most vibrant green without making the whole thing look like a science experiment.
No green food coloring? Mix 1/4 tsp blue + 1/4 tsp yellow gel coloring for that perfect retro shade. The mayo can be light or regular—just know regular gives you that classic creamy texture. Short on sour cream? Substitute with extra mayo, but you'll lose some tang. The vanilla extract is non-negotiable for that nostalgic flavor—nothing but pure extract will do. For the cherries, I like the Maraschino kind from a jar—they're sweet and hold their shape perfectly. Want to make it even more authentic? Add a pinch of ground nutmeg to the gelatin mixture for that old-school holiday touch.
This salad keeps beautifully in the fridge for 3-4 days, though it's best on day 2 when everything has time to meld. Make it ahead and store the layers separately—just assemble right before serving. The whipped cream topping? Add it right before serving so it stays fluffy. For serving, I like to use individual plastic cups—they're perfect for potlucks and keep everything contained. If you make extra, it's great for lunches the next day—just pack it in a container with a tight lid to keep those layers intact.
Why You'll Love This Recipe
- No-Chop Required: I swear, this is one of those recipes where you literally just dump ingredients in. The crushed pineapple’s already drained—no prep, no fuss. Even if you’re the kind of person who burns toast, you’ll nail this.
- Tangy Sweet Magic: That bright green color isn’t just for show—it’s the creamy mayo and sour cream cutting through the gelatin’s jiggle, while the pineapple adds just enough sweetness to make it ridiculously addictive. Honestly, it’s the kind of dish that sneaks up on you as a favorite.
- Potluck MVP: Between us, this is the dish that gets every plate cleared at summer gatherings. It’s cold, it’s pretty, and it pairs with anything—ham, turkey, or just straight from the bowl. (Yes, even on a Tuesday night.)
- Leftovers? More Like Zero Wastage: Make a big batch, and you’ll have seconds for lunch the next day. The gelatin holds up perfectly, and the flavors only get better as the pineapple soaks in overnight. Budget-friendly? Absolutely—it’s basically pantry staples with a party in your mouth.
Step-by-step instructions for grandma's green jello salad
Here's how to create this nostalgic, creamy masterpiece with perfect layers and pineapple crunch!
👨🍳 Step 1: Prepare the Green Jello Layer
In a medium bowl, sprinkle 2 packages green gelatin evenly over the 2 cups boiling water. Let it sit for 5 minutes until completely dissolved—you'll see it transform from powder to a thick, vibrant green liquid. This is your base layer that will give the salad its iconic color and structure.
While waiting, mix the 0.25 cup granulated sugar, 1 tsp vanilla extract, and 0.25 tsp salt into the gelatin mixture. Stir gently with a whisk until fully combined. The sugar will help balance the tangy gelatin flavor, while the vanilla adds that classic retro sweetness. Here's the thing—don't rush this step. The gelatin needs to cool slightly before adding the mayonnaise, or it might curdle.
🍳 Step 2: Combine Creamy Base Layers
In a large mixing bowl, combine the cooled gelatin mixture with the 1.5 cups mayonnaise and 0.5 cup sour cream. Use a hand mixer on low speed for 2-3 minutes until completely smooth and creamy. This is where the magic happens—the mayonnaise and sour cream create that signature retro texture that's neither too thick nor too runny.
Real talk: if you see any lumps, strain the mixture through a fine-mesh sieve for that silky-smooth consistency we're after. The mixture should be thick enough to hold its shape but still spreadable. Here's your sensory checkpoint: when you run a spoon through it, there should be no resistance, and it should leave a clean trail behind.
🥘 Step 3: Add Pineapple and Color
Drain the 1 can crushed pineapple completely, reserving 0.25 cup pineapple juice in a separate bowl. Fold the drained pineapple into the gelatin mixture along with the reserved juice. The pineapple adds that perfect crunch and tropical sweetness that balances the creamy base.
Add the 0.5 tsp food coloring and mix until evenly distributed. You want a vibrant green color that's consistent throughout—no streaks or splotches. If your coloring isn't vibrant enough, you can add a tiny bit more, but start with just the 0.5 tsp as called for. Here's where it gets fun: the color should be bright enough to look appetizing but not neon—think "grandma's garden fresh" rather than "holiday party centerpiece."
⏰ Step 4: Assemble and Chill for Perfect Layers
Transfer half of the green mixture to a 9x13-inch glass baking dish. Smooth the top with a rubber spatula, creating an even layer. Then gently spoon the remaining mixture on top, creating a second layer. This layering technique is what gives this salad its signature look and texture.
Press 0.5 cup chopped maraschino cherries into the top layer, creating a marbled effect. The cherries add a pop of color and a sweet-tart contrast that's essential to this classic recipe. Cover the dish with plastic wrap and refrigerate for at least 4 hours, or preferably overnight. This chilling time is crucial—it allows the layers to set properly and develop that perfect creamy consistency we're after.
🍽️ Step 5: Serve with Whipped Cream Topping
Before serving, top each portion with a dollop of 0.5 cup whipped cream. The contrast between the cool, creamy salad and the light, airy whipped cream is what makes this dish truly special. I like to use a piping bag with a star tip for an elegant presentation, but a spoon works just fine too.
Serve immediately while still chilled. Each bite should deliver that perfect combination of creamy gelatin, sweet pineapple, and tart cherries. The texture should be cool and silky, with just the right amount of crunch from the pineapple and cherries. And here's the best part: this salad tastes even better the next day as the flavors meld together!
Pro Tips For Making Grandma'S Green Jello Salad
- Measure Gelatin Precisely: Use a kitchen scale for the gelatin—those little powder scoops are sneaky. I learned this the hard way when my salad turned into a wobbly mess because I eyeballed it. Two teaspoons is exactly what you need, no more, no less.
- Drain Pineapple Well: Skip the "quick drain" step—let that crushed pineapple sit in a fine-mesh strainer for 5 minutes. The extra moisture makes the salad watery, and no one wants a soggy green blob. (Yes, even if you’re impatient like me.)
- Chill the Mayo First: Cold mayo is your friend—whisk it into the warm gelatin last, and fold it in gently. I used to dump everything in at once, and the texture always ended up grainy. A quick 10-minute fridge break for the mayo smooths it out.
- Fold, Don’t Stir: Use a rubber spatula and fold the sour cream and pineapple into the gelatin mixture like you’re making a cake batter. Stirring breaks up the gelatin strands and turns your salad into a sad, runny puddle. Be gentle—this isn’t a smoothie.
Pro cooking tips for this recipe
Gelatin Timing Tricks
Timing is everything with gelatin—don't rush the 5-minute dissolve in boiling water. I've learned the hard way that cutting this short leads to grainy texture. After dissolving, let the mixture cool to room temperature before mixing with mayo, or you'll risk curdling.
Pro tip: Place the bowl in an ice bath for 10 minutes after dissolving if you're short on time—this speeds up cooling without overworking the mixture. 🌡️
Layering Like a Pro
The secret to perfect layers isn't just about chilling time—it's about technique. Use a rubber spatula to create an even first layer, then gently spoon the second layer on top at a slight angle. This creates natural separation without mixing.
For extra stability, tap the dish gently on the counter after each layer to eliminate air bubbles. I've found that using a 9x13-inch glass dish (not plastic) gives the cleanest layers and easiest release when serving.
Mayo Texture Hacks
Not all mayonnaise is created equal for this recipe. I recommend Duke's or Hellmann's full-fat mayo for that classic creamy texture. If you're using light mayo, add 1 extra tablespoon of sour cream to compensate for the lower fat content.
For a silky finish, strain the final mixture through a fine-mesh sieve—this removes any lumps and gives that restaurant-quality smoothness. The mixture should coat the back of a spoon but still be spreadable, not gluey.
Pineapple Prep Matters
Draining pineapple properly makes all the difference. After opening the can, place the pineapple in a fine-mesh strainer and press gently with a spoon to remove all excess juice. Reserve ¼ cup juice for the recipe—this adds sweetness and helps bind the layers.
For extra crunch, I like to drain the pineapple overnight in the fridge before using. This removes more moisture and intensifies the sweetness. Skip the pineapple juice from the can—it's too watery and will make your salad runny. 🍍
Color Consistency
Getting that perfect retro green color takes practice. Start with ½ teaspoon Wilton's gel food coloring and adjust only if needed—liquid coloring can make your salad look like a science experiment. For a more authentic look, mix ¼ teaspoon blue + ¼ teaspoon yellow gel coloring.
Stir the coloring into the warm gelatin mixture (not cold) for even distribution. The color should be vibrant but natural-looking—think "grandma's garden" not "neon sign." If your coloring separates, gently reheat the mixture to 100°F and stir again.
Chilling Secrets
While 4 hours is the minimum chilling time, I've found that letting it set overnight develops deeper flavor and firmer layers. For potlucks, assemble the salad in individual plastic cups or ramekins—this keeps portions clean and makes serving easier.
Place a piece of plastic wrap directly on the surface before covering to prevent a skin from forming. If you're short on time, chill the assembled salad in the freezer for 1 hour (then finish chilling in the fridge)—this cuts chilling time in half without affecting texture. ❄️
Nutrition facts
Frequently asked questions
Can I make this salad without gelatin?
The classic texture comes from gelatin, but you can substitute with 1.5 cups agar-agar powder (vegan alternative) or 1.5 cups cornstarch slurry for a firmer set. The layers won't be as creamy, but the flavor will still shine. For a no-chill version, use 3 cups whipped cream cheese instead of mayo and sour cream.
Why did my layers separate?
Most likely, your gelatin didn't cool enough before mixing with mayo or you didn't chill it long enough. Always let the gelatin cool to room temperature before combining, and chill for at least 4 hours. For extra stability, add 1 extra tablespoon of cornstarch to the gelatin mixture before chilling.
What's the best way to serve this at a potluck?
Assemble the salad in individual plastic cups or ramekins for easy serving. Top each portion with whipped cream right before guests arrive. For a festive touch, garnish with extra cherries or a sprinkle of crushed pineapple on top. This keeps portions clean and makes serving effortless!
Can I make this salad ahead of time?
This salad tastes even better the next day. Assemble it up to 24 hours ahead and store covered in the fridge. For best texture, let it sit at room temperature for 10 minutes before serving to soften slightly. The layers will hold perfectly if stored in an airtight container.
What other fruits can I add besides pineapple?
Try drained canned peaches or mandarin oranges for a different twist. For a savory version, swap pineapple for diced celery and sweet relish. Just be sure to drain all fruit completely to maintain the creamy texture. The key is keeping the moisture level balanced!