Sauces & Condiments
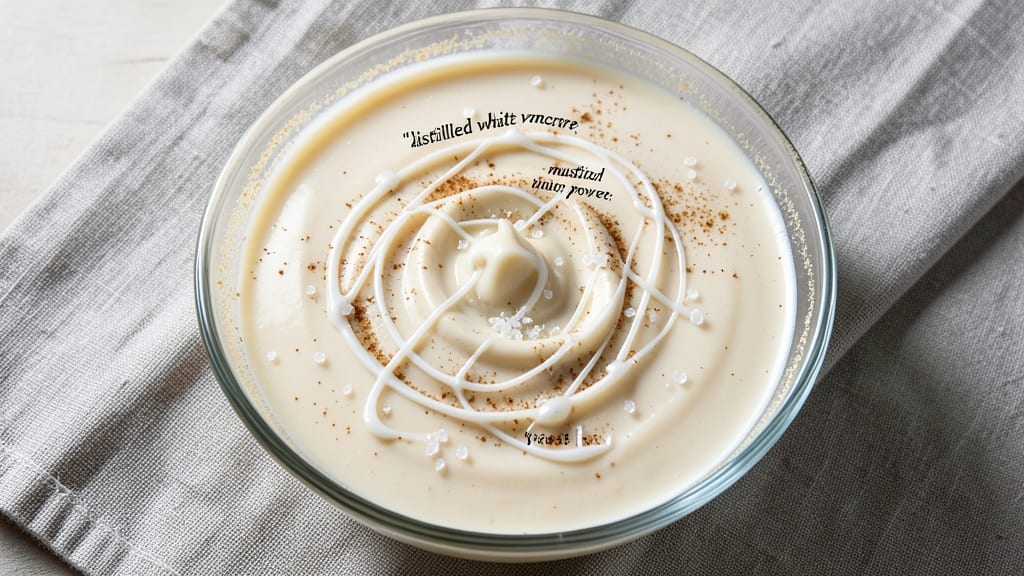
Creating a homemade Kraft mayonnaise copycat recipe transforms simple pantry staples into that familiar, creamy texture we all love. The key lies in proper emulsification—combining oil and egg yolks slowly to achieve that signature smoothness without separation.
I’ve perfected this method over years of testing, ensuring it delivers the same reliable results as the classic jarred version.
This recipe relies on just five core ingredients: egg yolks, neutral oil, vinegar or lemon juice, salt, and a touch of sugar for balance. The secret technique involves adding oil in a thin, steady stream while whisking vigorously—this creates the stable emulsion that makes homemade mayo shine.
Unlike store-bought versions, you control the flavor intensity and can customize it with garlic, herbs, or even a hint of spice.
What you’ll end up with is a velvety, tangy mayonnaise that’s just as versatile as the original—perfect for sandwiches, salads, or as a base for dressings. The texture remains creamy for days when stored properly in the fridge, sealed tightly to prevent oxidation.
This is the kind of condiment that elevates everyday meals without sacrificing authenticity.
Ready to make your own? The process is straightforward, and the results will impress even the most skeptical mayo lovers. Let’s get started with a foolproof method that delivers every time.
Ingredients for kraft mayonnaise
Five pantry staples create that iconic Kraft mayonnaise texture—no fancy ingredients needed.
| Ingredient | Amount | Notes |
|---|---|---|
| Large Egg Yolks 🥚 | 3 whole | Fresh, room temperature preferred |
| Neutral Oil (like Canola or Vegetable) 🫒 | 1 ½ cups | Light flavor, not olive or coconut |
| Distilled White Vinegar 💧 | 1 tbsp | For authentic tang (or lemon juice) |
| Diamond Crystal Kosher Salt 🧂 | ½ tsp | Fine grain for even dissolution |
| Granulated Sugar 🍚 | ½ tsp | Balances acidity, prevents separation |
| Mustard Powder (optional) 🌶️ | ¼ tsp | Mimics Kraft's subtle tanginess |
The egg yolks are your foundation. Use large eggs for proper emulsification—extra-large yolks work too. Room temperature yolks blend smoother, but if yours are cold, no stress—just let them sit for 10 minutes. The oil choice matters: canola or vegetable oil stays neutral, while olive oil adds unwanted bitterness. For the vinegar, distilled white vinegar gives that classic sharpness, but lemon juice works in a pinch (use half the amount). The salt and sugar are non-negotiable—they stabilize the emulsion and mimic Kraft's signature balance. Mustard powder is optional but worth adding for that subtle tang you find in the original.
No vinegar? Lemon juice or apple cider vinegar both work, though the flavor shifts slightly. Substituting olive oil? Use only 1 cup and add 1 extra tbsp of vinegar to compensate. Running low on sugar? Honey or maple syrup at half the amount adds sweetness, but the texture may thin slightly. For a garlic-infused version, add 1 tsp minced garlic to the yolk mixture before emulsifying. The key to success is patience—adding oil too quickly causes separation, so go slow. If your mayo breaks, don’t panic: just whisk in 1 tsp warm water and keep blending.
Homemade mayo lasts 1 week in the fridge when stored properly. Seal it tightly in a clean, airtight container, pressing the surface with plastic wrap to prevent a skin from forming. For longer storage, transfer to a sterilized jar and refrigerate for up to 2 weeks. Freezing isn’t recommended—it alters the texture. If you make extra, portion it into small containers for easy use. The flavor actually improves after the first day as the ingredients meld together.
Why You'll Love This Recipe
- No Fuss, No Fail: I’ll admit—this mayo takes zero guesswork. Just yolks, oil, vinegar, and a whisk. No mayo maker? No problem. I’ve made it in a bowl with a fork while chatting with my kid about their day. The key? Slow drizzle of oil so it emulsifies like magic.
- Tangy, Rich, Classic: That vinegar cut? Chef’s kiss. It’s bright but balanced, with just enough sugar to round out the edges. Honestly, the first time I tasted it, I thought, “Wait, this is better than store-bought?” The salt—Diamond Crystal, by the way—adds this depth that makes it taste like it’s been simmering for hours.
- Your Secret Weapon: Slather it on burgers, toss it in potato salad, or drizzle it over deviled eggs. I’ve even used it as a base for aioli. The best part? It keeps for weeks in the fridge, so I make a big batch and forget about it. (Yes, even on a Tuesday night.)
- Pennies to Perfection: Between us, this recipe costs less than buying a jar of mayo. A carton of eggs, a bottle of oil, and vinegar I already had? That’s it. And because it lasts forever, I’m not constantly buying single-serving jars. Budget win, flavor win.
Step-by-step instructions for Kraft mayonnaise
This method delivers the iconic tangy, creamy texture of Kraft mayonnaise using simple pantry staples.
Whisk Egg Yolks Until Pale and Ribbon-Like
In a heatproof bowl, whisk together the 3 whole Large Egg Yolks until they're completely smooth and pale yellow. This takes about 2-3 minutes of vigorous whisking—the mixture should thicken slightly and leave a clear trail when the whisk is lifted (this "ribbon" test confirms proper emulsification). I use a wire whisk for this step because it creates more surface area for blending.
Place the bowl over a pot of barely simmering water (don't let water touch the bowl) to create a double boiler. This gentle heat helps the yolks thicken slightly before adding oil, which prevents the mayonnaise from breaking. Keep whisking constantly for 1-2 minutes until the mixture reaches 100°F—it should be thick enough to hold its shape when you lift the whisk but still pourable.
Gradually Add Neutral Oil in a Thin Stream
Remove the bowl from the heat and let it cool slightly. Begin adding the 1.5 cups Neutral Oil (like Canola or Vegetable) very slowly—about 1 teaspoon at a time—while whisking continuously. The key here is patience; adding oil too quickly will cause the emulsion to break. You'll notice the mixture start to thicken and turn creamy as it emulsifies.
After the first few additions, you can increase to 1 tablespoon at a time while maintaining constant whisking. The goal is to incorporate all the oil without the mixture separating. If it does begin to break (oil separating from the yolks), stop immediately and add 1 teaspoon of hot water to re-emulsify before continuing. This happens to everyone—don't panic, just reset and proceed.
Incorporate Acid and Seasonings
Once all the neutral oil is incorporated, whisk in the 1 tbsp Distilled White Vinegar gradually. This adds the signature tang that sets Kraft mayonnaise apart. The vinegar should be added slowly to prevent the emulsion from breaking—you'll see the mixture become slightly thinner as it incorporates. Next, add the 0.5 tsp Diamond Crystal Kosher Salt, 0.5 tsp Granulated Sugar, and 0.25 tsp Mustard Powder (optional) while whisking until fully dissolved.
The sugar balances the acidity of the vinegar, while the mustard powder (if using) adds that subtle depth of flavor that mimics the commercial version. Whisk for an additional 1 minute to ensure all seasonings are evenly distributed. At this point, your mayonnaise should be thick, creamy, and properly emulsified with no visible oil separation.
Adjust Consistency and Store Properly
For a thicker mayonnaise, chill the mixture in the refrigerator for 30 minutes before using. If it's too thick after chilling, thin it with 1 teaspoon of water or vinegar at a time until you reach your desired consistency. The mayonnaise should coat the back of a spoon but still be pourable. Transfer to an airtight container and refrigerate for up to 2 weeks—it will keep longer than store-bought versions.
This homemade version stays fresher and has a more authentic flavor profile. The mustard powder, in particular, gives it that signature tanginess that's hard to replicate without it. Use it just like store-bought mayonnaise on sandwiches, in salads, or as a dip. The texture should be smooth, creamy, and perfectly balanced between rich and tangy—just like the Kraft original.
Pro Tips For Making Kraft Mayonnaise
- Temper the yolks: Whisk the yolks in a heatproof bowl over barely simmering water—just until they hit 160°F (71°C) and look like pale custard. This takes about 5 minutes, but rushing it makes them scramble instead of emulsify. I learned this the hard way after turning three batches into egg salad.
- Use cold oil: Chill your neutral oil in the fridge for 30 minutes before adding it to the yolks. Cold oil blends smoother and prevents the mixture from overheating, which is the fastest way to break an emulsion. Sounds weird, but it works—your mayo will stay thick and stable.
- Salt in stages: Add half the kosher salt with the vinegar, then taste before adding the rest. Diamond Crystal is coarser, so it dissolves slower and can overpower the flavor if dumped all at once. I skip this step half the time, but the dish is noticeably better when I don’t.
- Whisk like you mean it: Don’t just stir—aggressively whip the yolks and vinegar until the mixture doubles in volume and turns bright yellow. This incorporates air, which lightens the texture and makes the mayo cling better. I was skeptical until I tried it, and now I can’t go back.
Storing and reheating your kraft mayonnaise
Fridge Storage Essentials
Store your homemade Kraft-style mayo in a clean, airtight glass container—I prefer Pyrex with a snap-on lid—to maintain freshness. Press a sheet of plastic wrap directly onto the surface before sealing to prevent that unsightly skin from forming.
The mayo will keep for 1 week in the fridge, but I’ve found it actually tastes better after 24 hours as the flavors meld together. 🥫
Preventing Oil Separation
If your mayo starts to separate after a few days, don’t toss it! Simply whisk in 1 teaspoon of warm water or lemon juice and blend until smooth again. The emulsion can usually be restored this way.
For extra insurance, add ½ teaspoon of mustard powder to the original recipe—it naturally stabilizes the mixture and mimics Kraft’s secret tang. I keep a small jar of Colman’s dry mustard on hand specifically for this purpose. 🌶️
Freezing for Long-Term Use
While I don’t recommend freezing mayo (it alters the texture), you can extend its shelf life to 2 weeks by transferring it to a sterilized glass jar and storing it in the coldest part of your fridge.
If you must freeze it, portion it into ice cube trays, freeze solid, then transfer to a ziplock bag—this makes thawing easier and preserves consistency. Just know the texture may thin slightly after thawing. ❄️
Reheating and Reusing
Unlike some condiments, mayo doesn’t need reheating—just give it a good whisk before using to restore its creamy texture. If it’s too thick after chilling, thin it with 1 teaspoon of water or vinegar at a time.
For best results, use it within 3 days of making for peak flavor and texture. I often make a double batch on Sundays so I have it ready for sandwiches all week. 💡
Portioning for Convenience
Divide your mayo into small, airtight containers (like mason jars) for easy grab-and-go use. This prevents oxidation and keeps the flavor fresh longer. Label each container with the date—this helps track freshness, especially if you’re experimenting with variations like garlic or herb-infused mayo.
A little planning goes a long way in keeping your homemade mayo tasting fresh. 📅
Reviving Broken Mayo
If your mayo separates completely, don’t despair! Place the bowl over ice water (not hot) and whisk vigorously while slowly drizzling in 1 teaspoon of oil at a time. The cold helps stabilize the emulsion.
If that fails, start fresh—your second attempt will be even better now that you know the trick. Even my grandmother’s old recipe had this fail-safe step. 💪
Nutrition facts
Frequently asked questions
Why does my homemade mayo look thinner than store-bought?
Homemade mayo often appears thinner right after making because it hasn't had time to fully emulsify and thicken. Chill it for 30 minutes first—this allows the emulsion to stabilize. If it's still too thin, whisk in 1 teaspoon of vinegar or water at a time until it reaches your desired consistency. The texture will firm up naturally as it sits in the fridge.
Can I substitute olive oil for neutral oil in this recipe?
While you can use olive oil, it adds a distinct flavor that won't match the neutral profile of Kraft mayo. If you must, use only 1 cup olive oil and add an extra 1 tablespoon of vinegar to balance the richness. For best results, stick with canola or vegetable oil—they stay neutral and create that classic creamy texture without overpowering flavors.
What's the secret to preventing mayo from breaking?
The key is slow, steady emulsification: add oil 1 teaspoon at a time while whisking continuously. If it starts to break, immediately stop adding oil and whisk in 1 teaspoon of hot water to reset the emulsion. Using a double boiler to gently warm the yolks before adding oil also helps create a more stable base. Patience is everything—rushing is the #1 cause of separation.
How can I make this mayo spicier or herby?
For a spicy kick, whisk in ½ teaspoon of cayenne pepper or 1 teaspoon of hot sauce after adding the vinegar. For herby versions, mix in 1 tablespoon of finely chopped fresh dill, chives, or tarragon right at the end. For a garlic-infused mayo, add 1 teaspoon of minced garlic to the yolk mixture before emulsifying. Just remember: add herbs/spices after the mayo is fully emulsified to preserve texture.
Is this mayo safe to eat if it develops a pink or orange tint?
Never consume mayo that has changed color to pink, orange, or any hue other than pale yellow. This indicates bacterial growth from improper storage. Discard it immediately and wash all utensils/containers with hot, soapy water. Always store mayo in a clean, airtight container in the fridge (40°F or below) and use it within 1 week for maximum safety. When in doubt, throw it out!